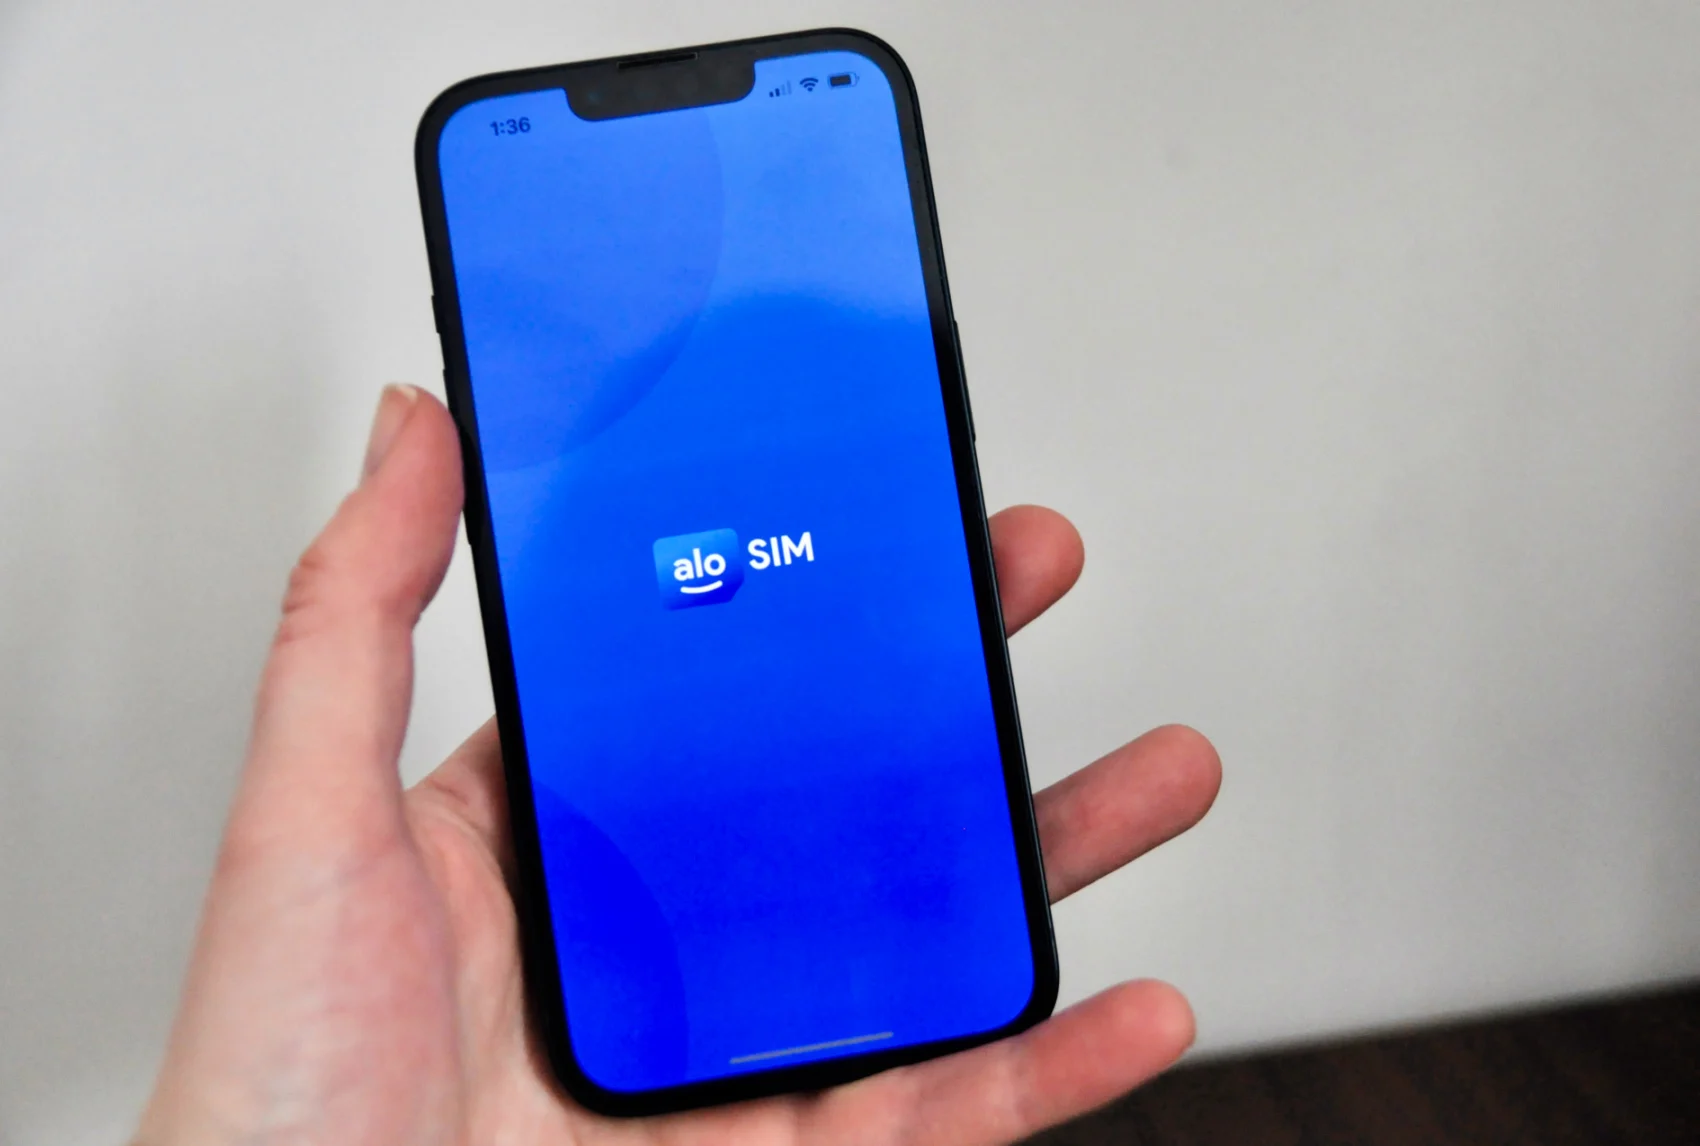
You've probably heard that an eSIM (embedded SIM) is a digital SIM card, but how do you install eSIM on your iPhone? It's actually a really fast process that takes less than two minutes.
A physical SIM card can't work if you leave it in the package, because it needs to be inserted into your phone. So it makes sense that a virtual SIM (eSIM) can't work unless it's also added to your phone. Except with an eSIM installation, you don't need to mess with any of your phone's components.
NO opening that little SIM card slot
NO touching any "real" SIM cards
NO removing or adding any SIM cards
What happens when I install eSIM?
When you install eSIM on your iPhone (or iPad), that eSIM is now a part of your device. (It's invisible and totally virtual, but it's there inside ... in a spiritual kind of way.)
An installed eSIM is sort of like an app on your phone. You can use it, but you can't see it, and you can eventually delete it (but we don't recommend that, unless you're absolutely sure you don't want to use that eSIM ever again.)
But an eSIM itself isn't enough to connect to those data networks. An eSIM is HOW you connect to the network, but you need ACCESS to those networks in order to use their data.
So once you install eSIM on your iPhone, you'll still need to activate your data package to get permission to start using the data. Make sense?
When do I install eSIM?
If you've purchased an eSIM data package to use while traveling to another country, we recommend installing your eSIM a couple of days prior to leaving. This is mostly so you know you're on a strong, reliable Wi-Fi or data connection.
It takes a bit of Wi-Fi or data to connect to aloSIM in order to download and install the eSIM, and we don't want the process to get interuppted by a crummy signal. (Please, please, please avoid installing your eSIM in an airport terminal, where the Wi-Fi can be awful.)
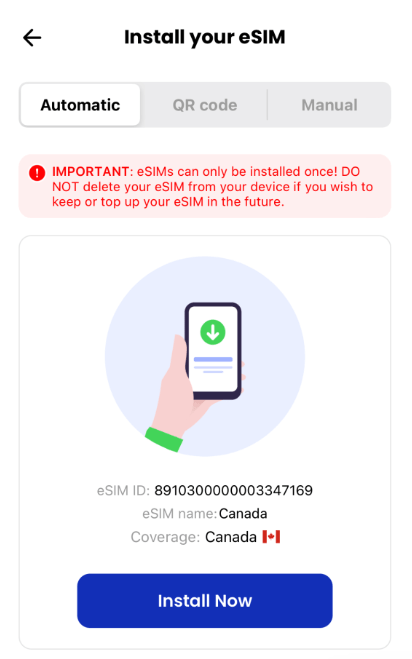
Then you can choose from Automatic, QR code, or Manual eSIM installation methods. (We recommend going with "Automatic," since it's exclusive to iPhone and iPad users, and it honestly does 99% of the work for you.)
Start by logging into your account within the aloSIM app or on alosim.com. Go to to "My eSIMs," select the eSIM you just purchased, choose "Install Your eSIM," and select the "Automatic" tab.
1. Tap the blue "Install Now" button
2. Tap "Continue" to let it work its magic
(This usually takes about two minutes, as the eSIM is installed on your device.)
If you're asked to choose a Default Line: Choose your Primary SIM, since eSIMs don't come with phone numbers.
If you're asked to choose a plan for iMessage and FaceTime: Choose your Primary SIM (and later, you can make sure iMessage is using your Apple ID email address as well)
If you're asked to choose a Cellular Data Source: Choose your Primary SIM if you're still at home. Choose your eSIM if you want to start using your data (and you're already in the correct country/region for your eSIM to work) and make sure "Allow Cellular Data Switching" is toggled OFF so your phone doesn't try to switch between your two SIMs.
Nicely done! Your eSIM has been installed using the Automatic method. If you're running the latest iOS, your APN will be set automatically. (If not, here's how to set it your APN to "alosim.")
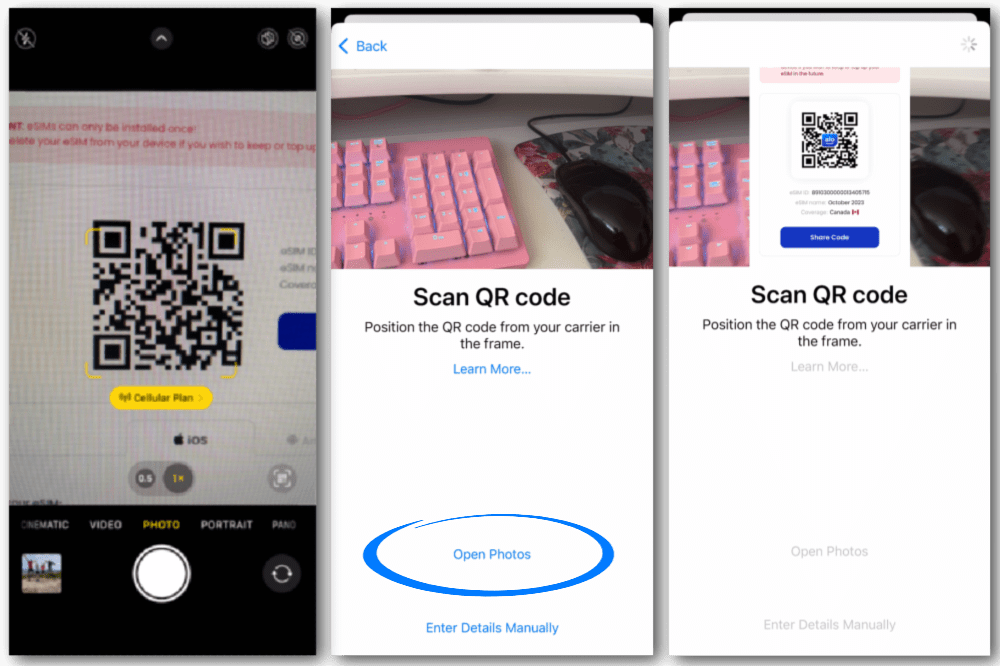
Start by logging into your account within the aloSIM app or on alosim.com. Go to to "My eSIMs," select the eSIM you just purchased, choose "Install Your eSIM," and select the "QR code" tab.
1. Share your QR code to another device (or open your account on another device) so you can scan it
(If you're running iOS 17 or newer, you can take a screenshot of your QR code instead. Go to Settings > Cellular > Tap 'Add eSIM' > Tap 'Use QR Code' > Tap 'Open Photos' to select your screenshot.)
2. Tap "Continue" to let it work its magic
(This usually takes about two minutes, as the eSIM is installed on your device.)
3. Follow the on-screen prompts
If you're asked to choose a Default Line: Always pick your Primary SIM, since your eSIM doesn't come with a phone number.
If you're asked to choose a plan for iMessage and FaceTime: Pick your Primary SIM (and later, you can make sure iMessage is using your Apple ID email address as well)
If you're asked to choose a Cellular Data Source: Choose your Primary SIM if you're still at home, using your regular data plan. But choose your eSIM if you want to start using your new data (and you're already in the correct country/region for your eSIM to work) and make sure "Allow Cellular Data Switching" is toggled OFF so your phone doesn't try to bounce you between your two SIMs.
Great job! Your eSIM has been installed using the QR code method. If you're running the latest iOS, your APN will be set automatically. (If not, here's how to set it your APN to "alosim.")
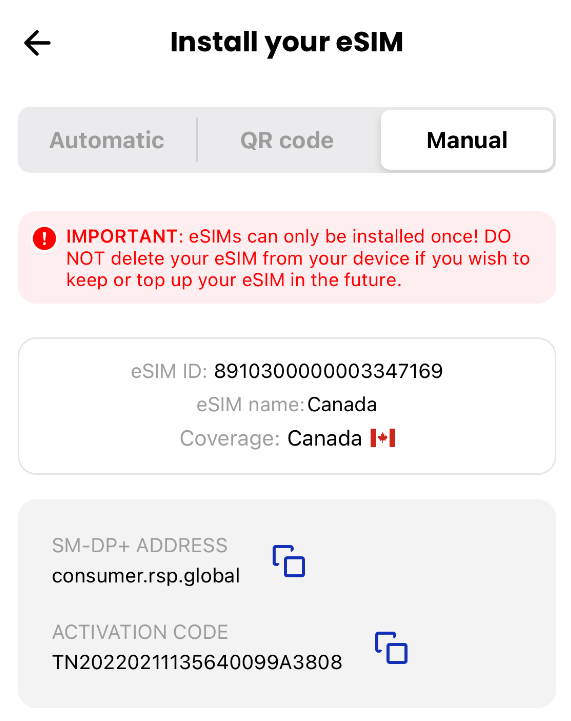
Start by logging into your account within the aloSIM app or on alosim.com. Go to to "My eSIMs," select the eSIM you just purchased, choose "Install Your eSIM," and select the "Manual" tab.
1. Copy your eSIM's SM-DP address
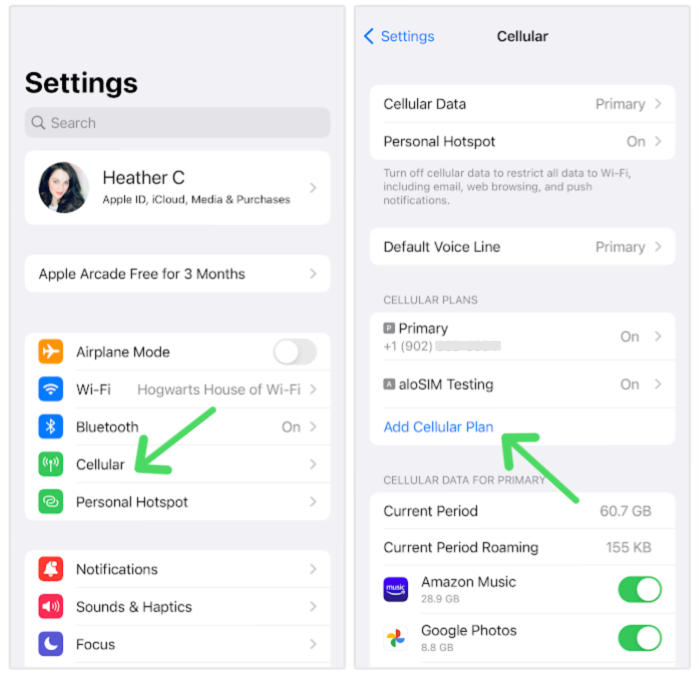
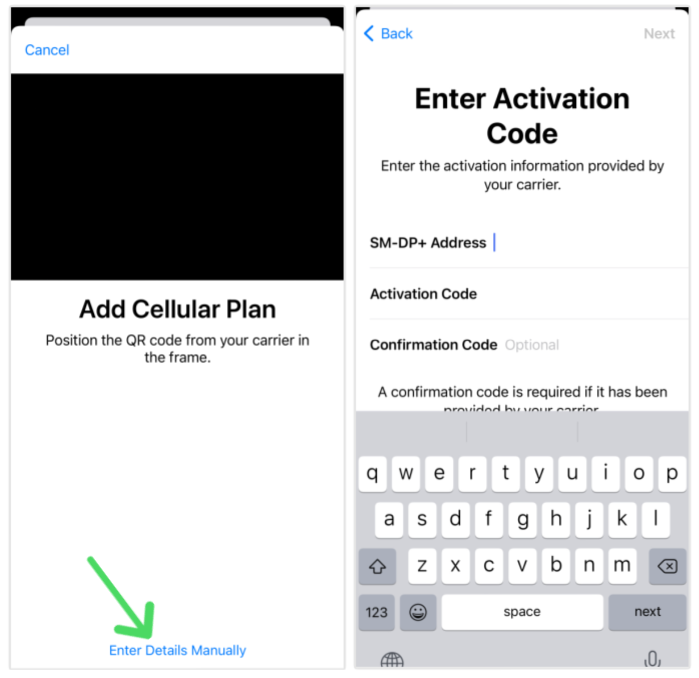
2. Go into your iPhone's settings, and tap "Cellular" then "Add Cellular Plan" (or "Add eSIM")
3. Instead of scanning a QR code, select "Enter Details Manually."
4. Paste in the SM-DP code you just copied
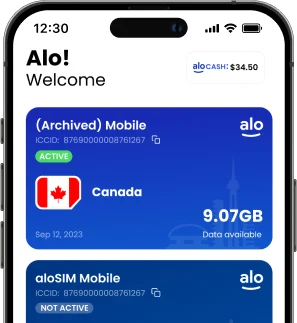
5. Go back into your aloSIM account and copy the Activation Code
6. Return to the "Enter Activation Code" screen and paste your Activation Code
5. Go back into the aloSIM app and copy the Activation Code
6. Return to the "Enter Activation Code" screen and paste your Activation Code
7. Follow the on-screen prompts
If you're asked to choose a Default Line: Select your Primary SIM, since your eSIM doesn't come with a phone number.
If you're asked to choose a plan for iMessage and FaceTime: Select your Primary SIM (Yes, you'll still be able to use iMessage and FaceTime even if you turn off your regular phone number, because in a minute, you can make sure iMessage is using your Apple ID email address as well)
If you're asked to choose a Cellular Data Source: Choose your Primary SIM if you're still at home, using your regular data plan. But choose your eSIM if you want to start using your new data (and you're already in the correct country/region for your eSIM to work) and make sure "Allow Cellular Data Switching" is toggled OFF so your phone doesn't try to bounce you between your two SIMs.
Great job! Your eSIM has been installed using the Manual eSIM install method. If you're running the latest iOS, your APN will be set automatically. (If not, here's how to set it your APN to "alosim.")
Let's quickly recap how to install eSIM on a compatible iPhone or iPad ...
Why do I need to install eSIM? To add the digital SIM card to your device.
What happens when I install eSIM? You're able to access new data networks.
When do I install eSIM? Anytime you have a strong connection for a smooth download.
Where do I install eSIM? You'll follow the instructions in your aloSIM app or alosim.com.
How do I install eSIM? Choose from the Automatic, QR code, or Manual eSIM installation options.
Have questions? Need help? Our awesome aloSIM Support team is available 24/7 for friendly assistance.
Written by Heather
Heather Clarke is a Canadian journalist and columnist whose work has appeared in newspapers and magazines across North America, including HuffPost, The Telegram, and Business Voice. Since moving into the tech world in 2022, she has been writing about eSIM technology and travel roaming for notable publications, including Medium, Yahoo, and TechRadar.