You’ve probably heard a lot of buzz around getting an iPhone eSIM data plan. Maybe you weren’t sure if you needed one, or how to get one set up on your device? Well, we’re here today to run through exactly how to get an iPhone eSIM data plan. It’s fast, easy, and a total game-changer.
First off, an eSIM is a digital version of a traditional plastic SIM card that gives a device the ability to make/receive phone calls and texts. Instead of swapping SIM cards, eSIMs can be purchased and activated right on your iPhone in seconds.
If you’re traveling, of course, you want to have a “local” number so you’re not paying atrocious roaming charges. But eSIMs are also handy close to home, as a back-up in areas with shoddy service with one provider, or for business purposes (one number for business, another for personal calls).
At the end of the day, people choose eSIM technology because they want the flexibility to hop between different plans, and iPhones make that really easy.
1. Browse eSIM data plans
There are SO many different options out there, so use aloSIM to browse around, compare prices, and see what data plan works for you. We always want to make sure you’re paying for exactly what you need, with the freedom to add to the plan if you need it (rather than being stuck paying for way more than you’ll ever use).
2. Purchase an eSIM data plan
Once you’ve found the perfect plan for what you need, complete the purchase right on your device. (No need to go into a store or mess around with physical SIM cards, like the olden days.) You’ll receive a special QR code that contains the details of your plan, and you’ll use that in the next step.
3. Activate your new iPhone eSIM data plan
Once you’re in the “Settings” section of your iPhone, it just takes a few seconds to complete the prompts to activate your new eSIM plan. (We’ve got the full step-by-step instructions here for you.)
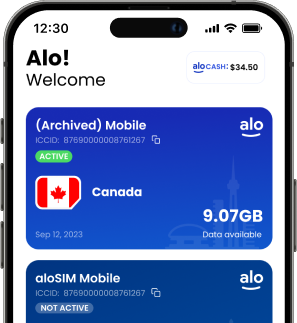
It will include scanning the QR code you just received (or typing in the details manually, if you’d prefer) and renaming your eSIM plans if you’d like (i.e. “Home” and “Canada (aloSIM).”) You’ll also take a second to update your APN settings and Data Roaming settings to make sure your phone gets connected to the local network.
The beauty of eSIM technology is that it’s easy to hop back and forth between your iPhone’s data plans as needed, anytime you want. You can also have multiple eSIM plans on the go, for anywhere your life takes you.
Want to learn more about eSIM technology for your iPhone? Check out aloSIM for local and regional eSIM plans.
YOU MIGHT ALSO LIKE …
* How to activate eSIM on your iPhone


