How to activate eSIM on your iPhone
Get instant mobile data in 200+ countries
Disable your Primary SIM to prevent call/text fees
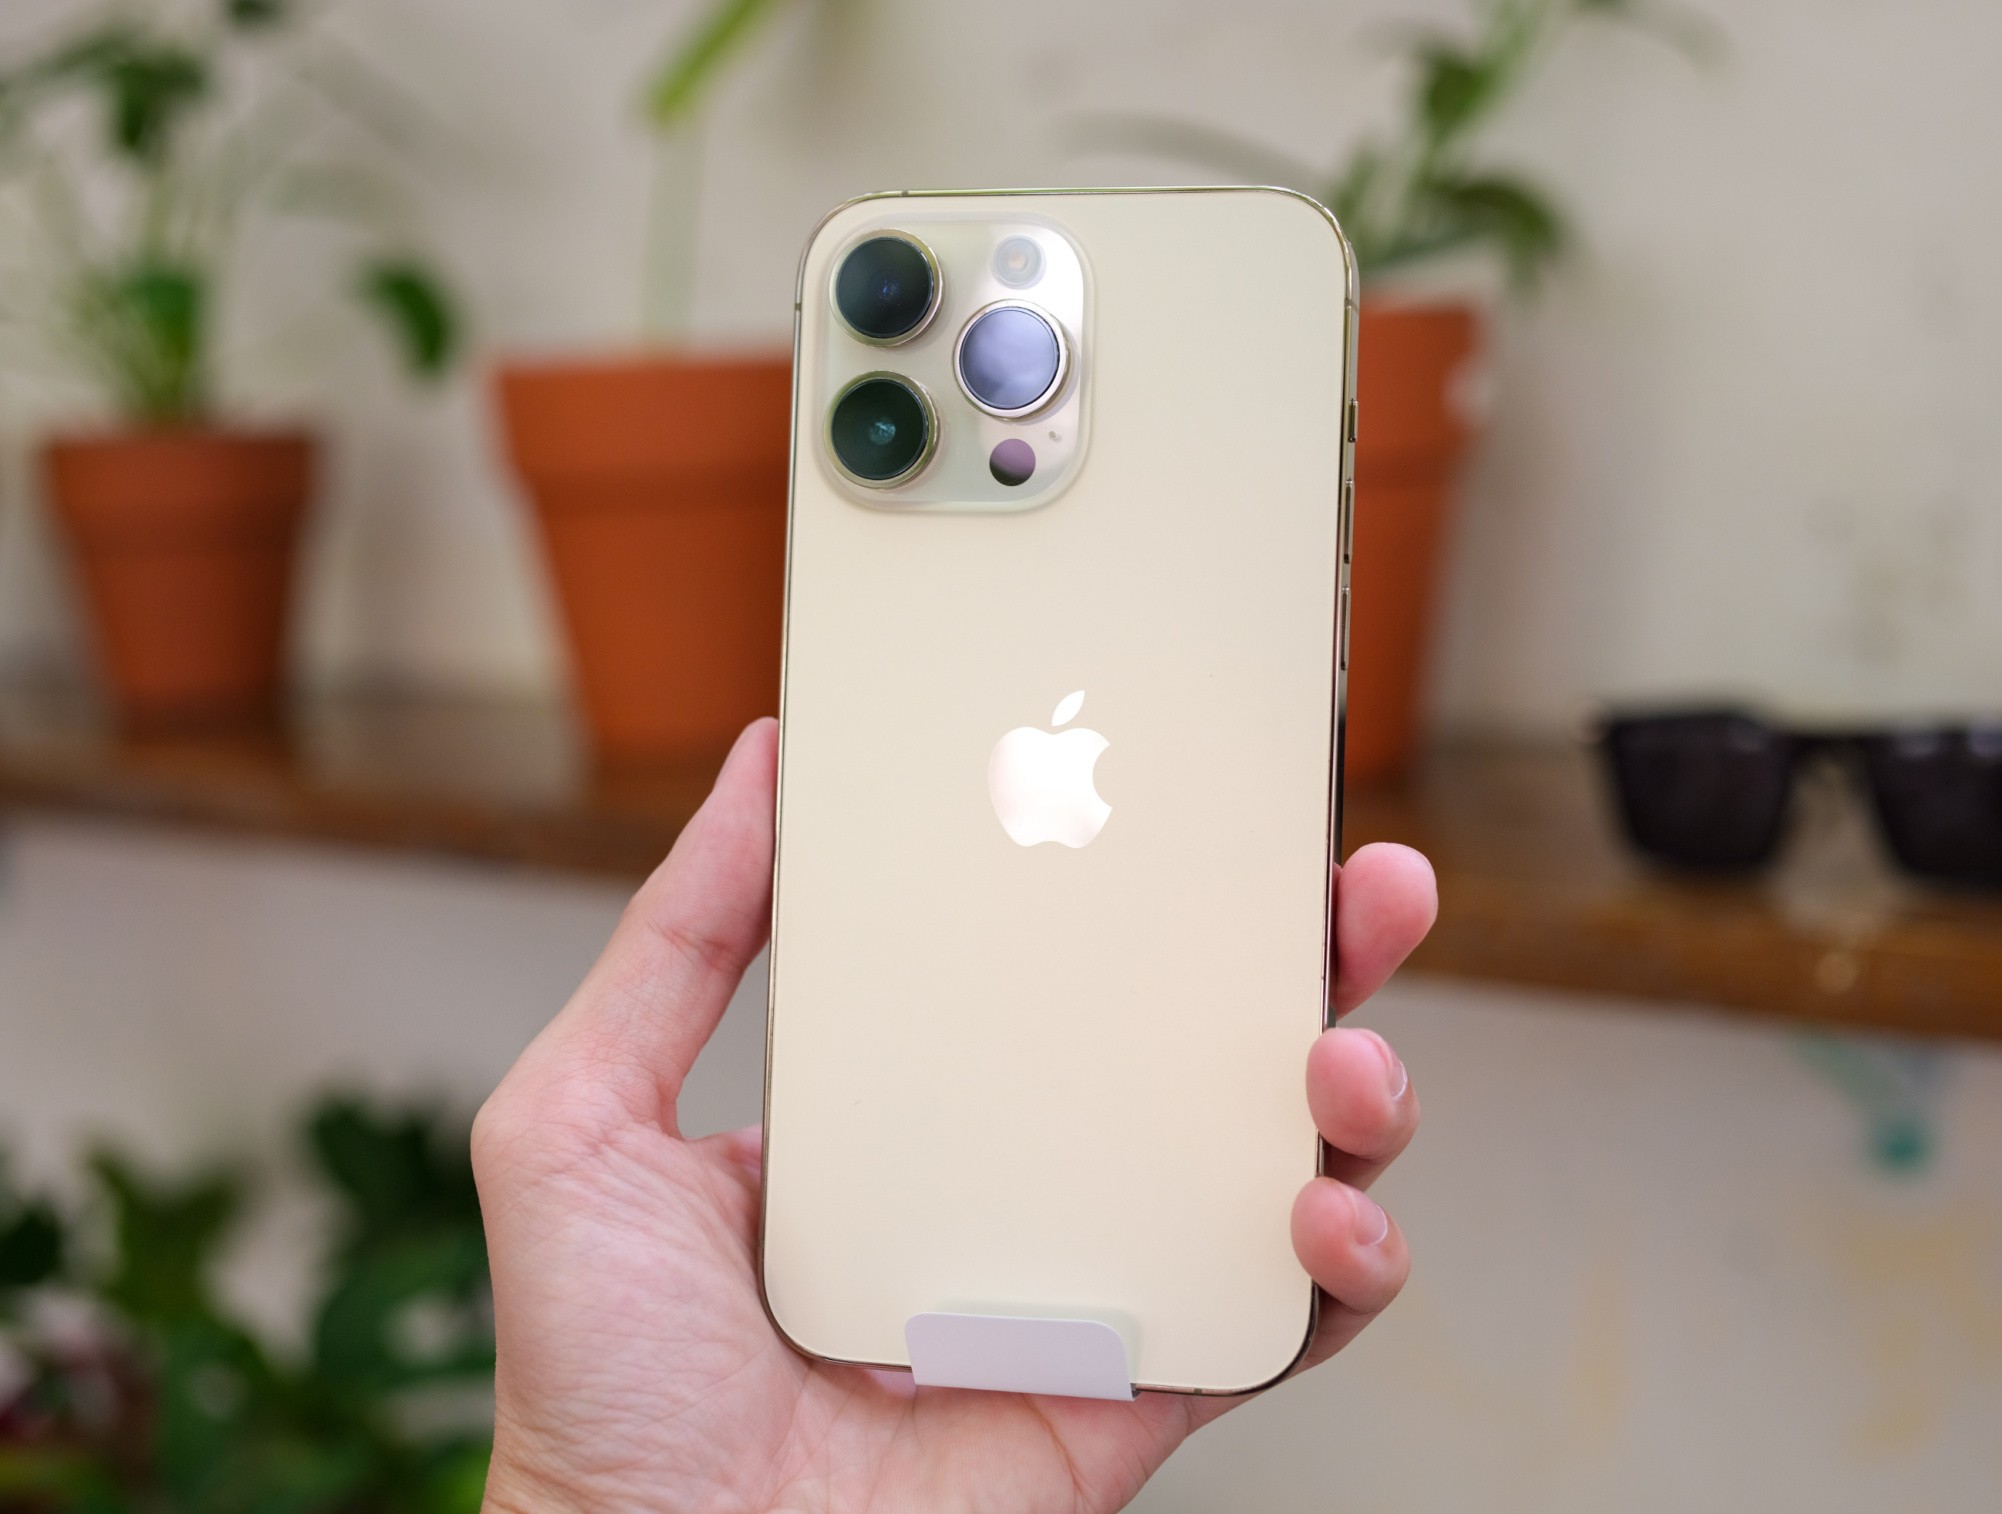
While you're still at home ...
Once you’ve purchased an eSIM data package and installed your eSIM, here are a few important steps to do next in order to activate eSIM on your iPhone.
You can complete these first few steps while you’re still at home (to prepare your device for travel), or when you’ve already arrived at your destination.
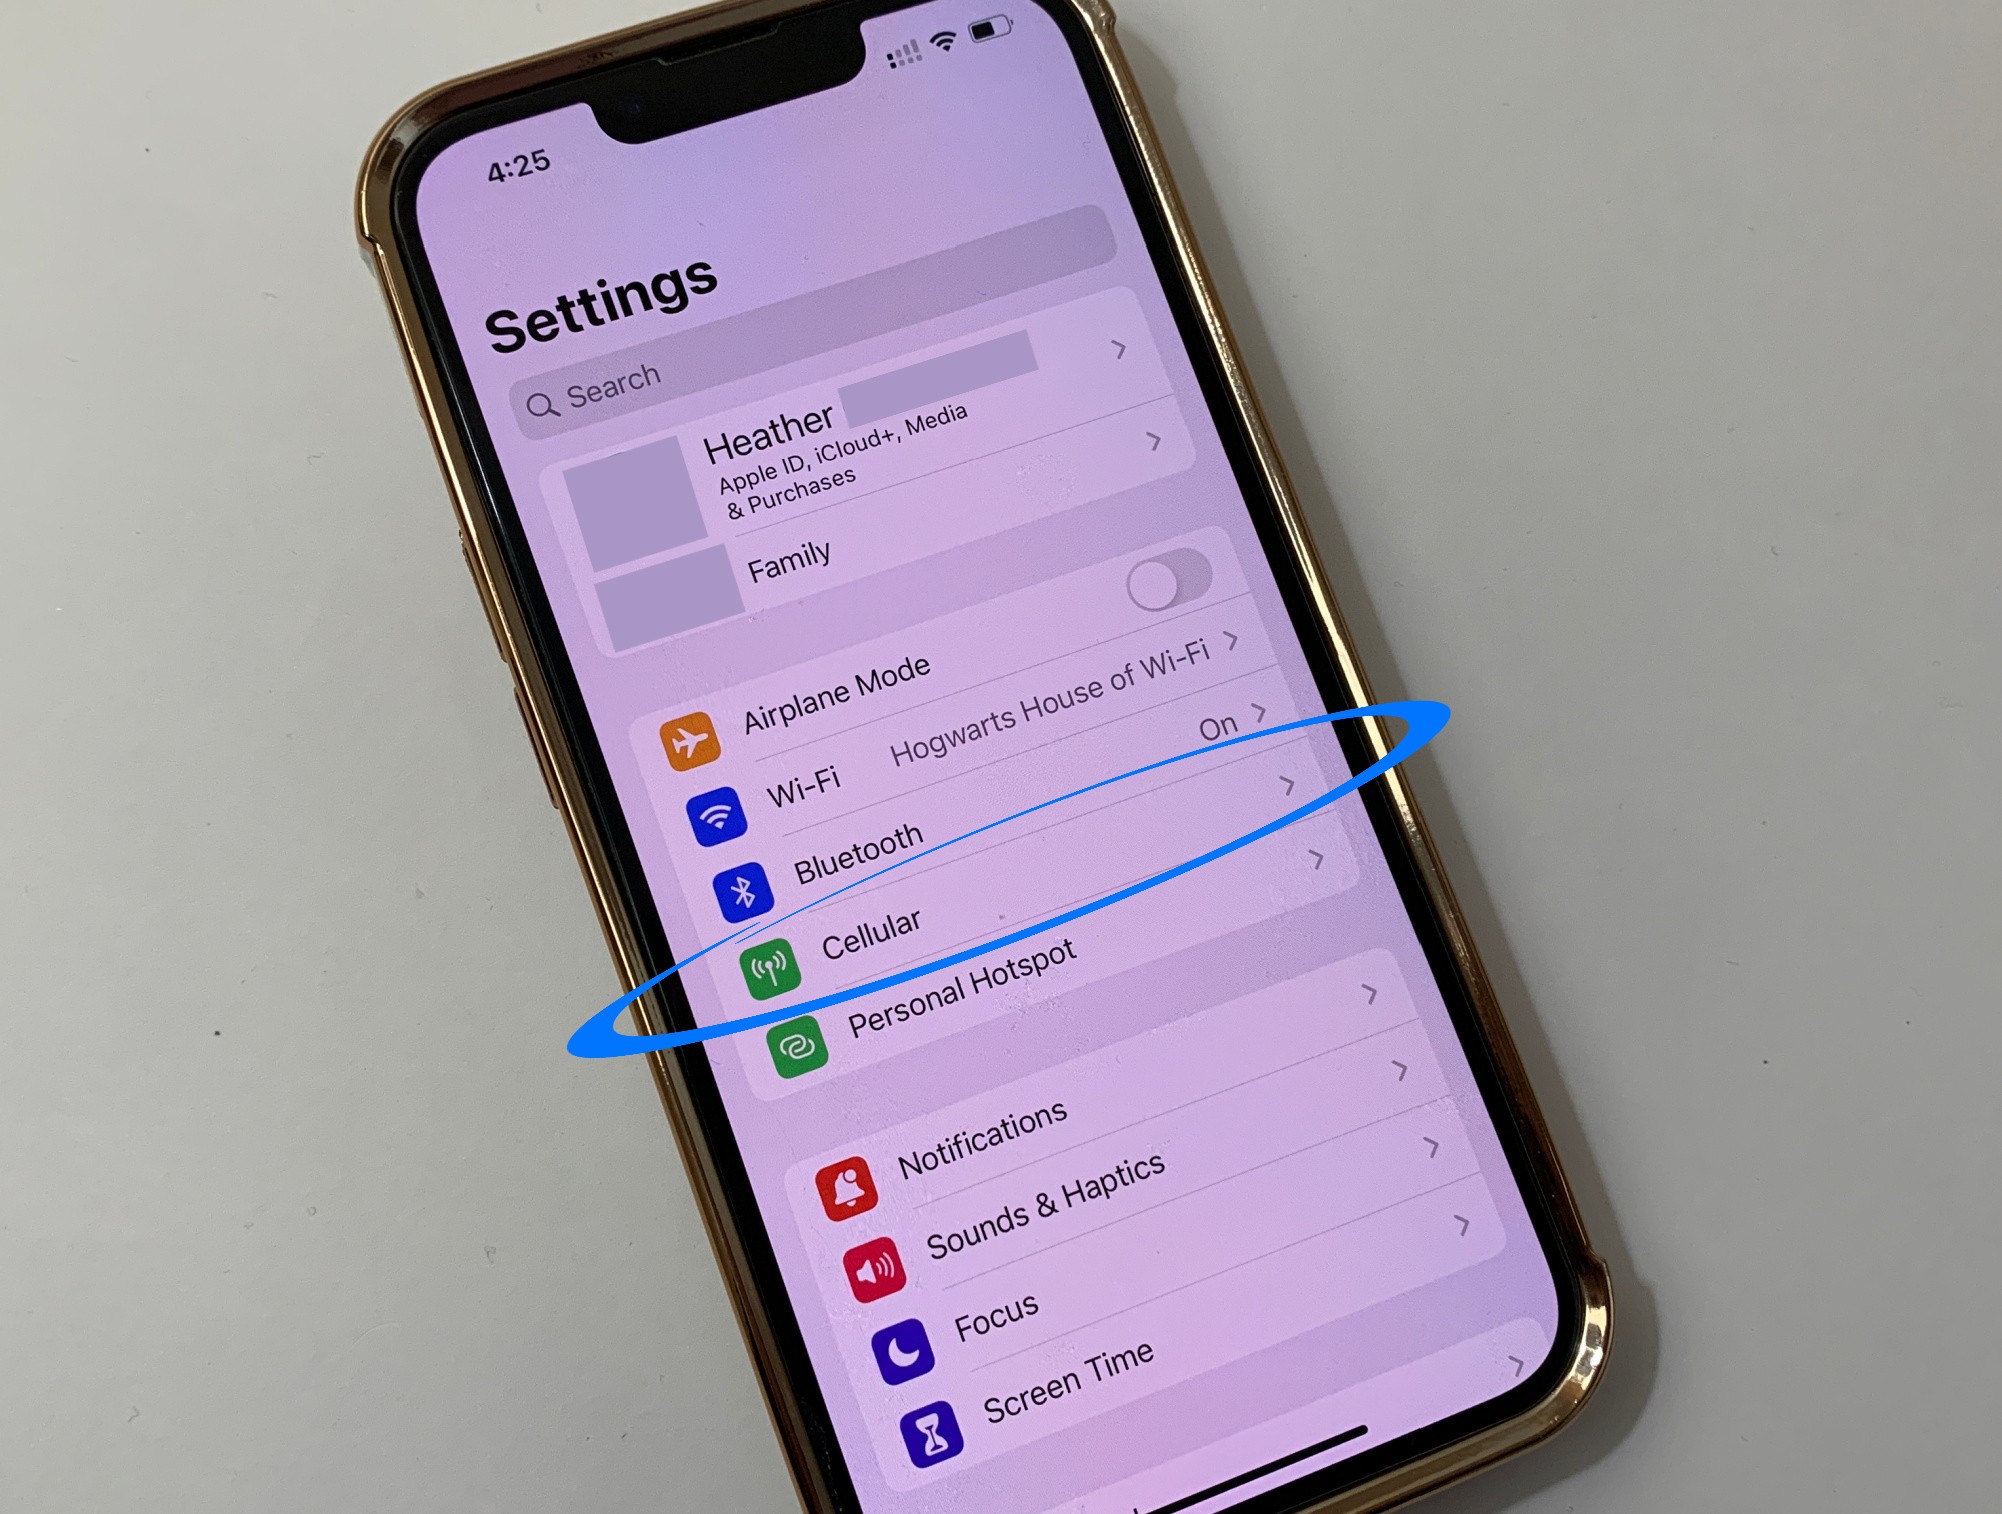
Go to "Settings" then "Cellular"
In order to activate your iPhone eSIM, we need to change a few of your iPhone settings. You’ll go to “Settings” and then select “Cellular” or “Network” (with a little green signal icon).
Settings > Cellular (or Network)
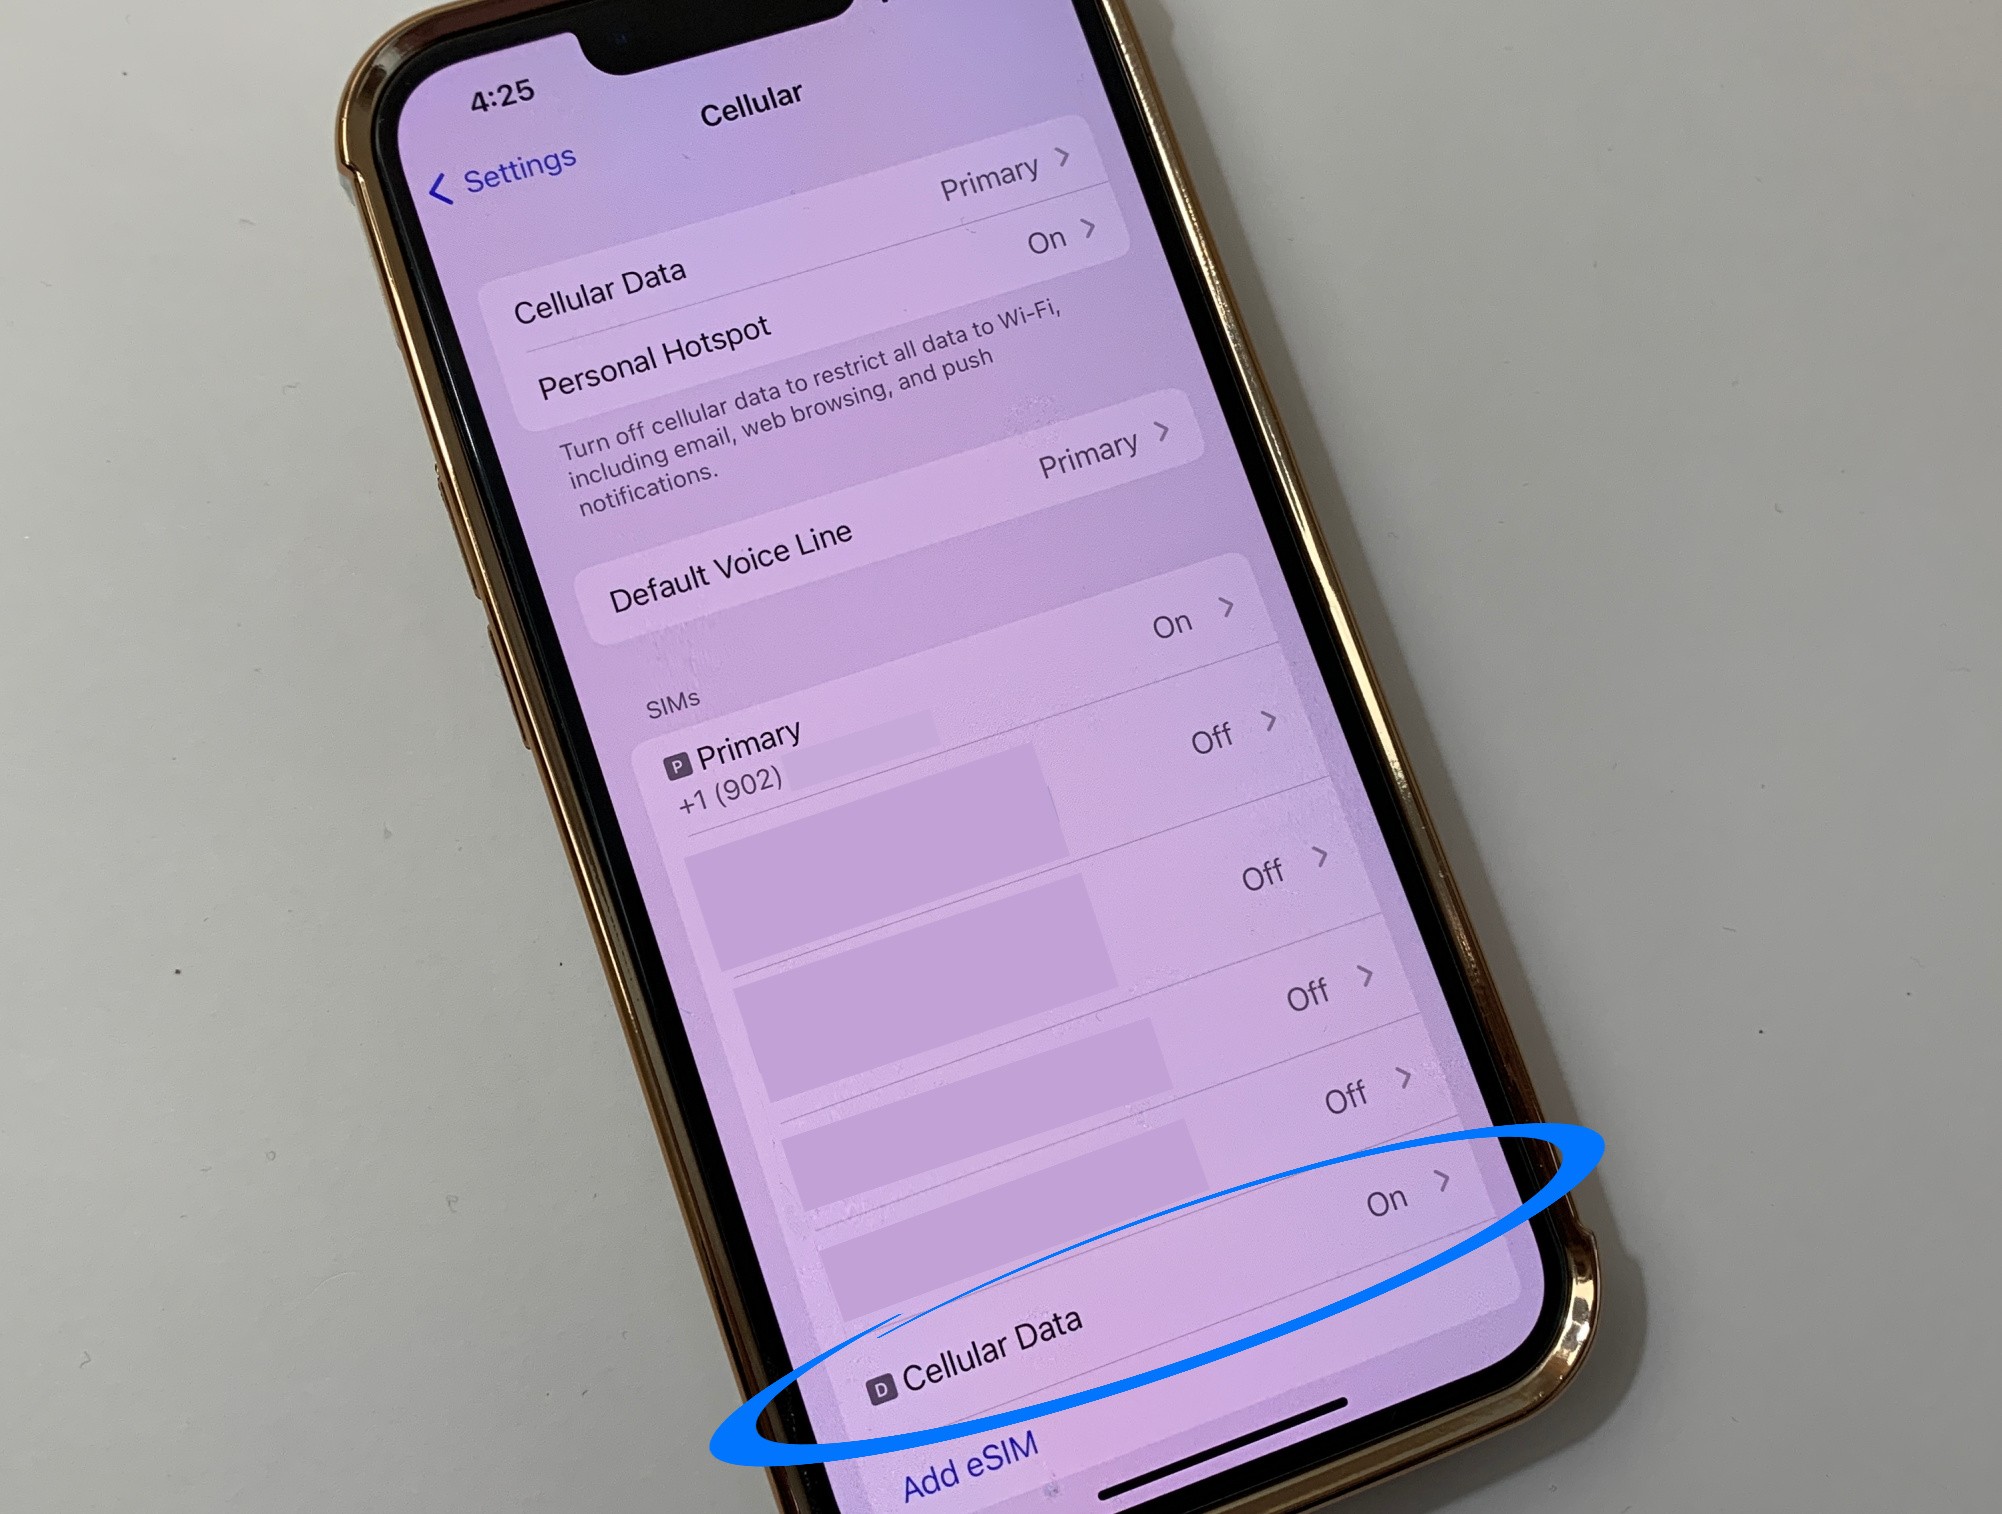
Select your eSIM from the list
Now it’s time to choose your newly-installed eSIM. Your iPhone named it something automatically during installation (maybe “Travel” or “Secondary” or “Cellular Data”) but you can rename it.
Settings > Cellular > Select your eSIM
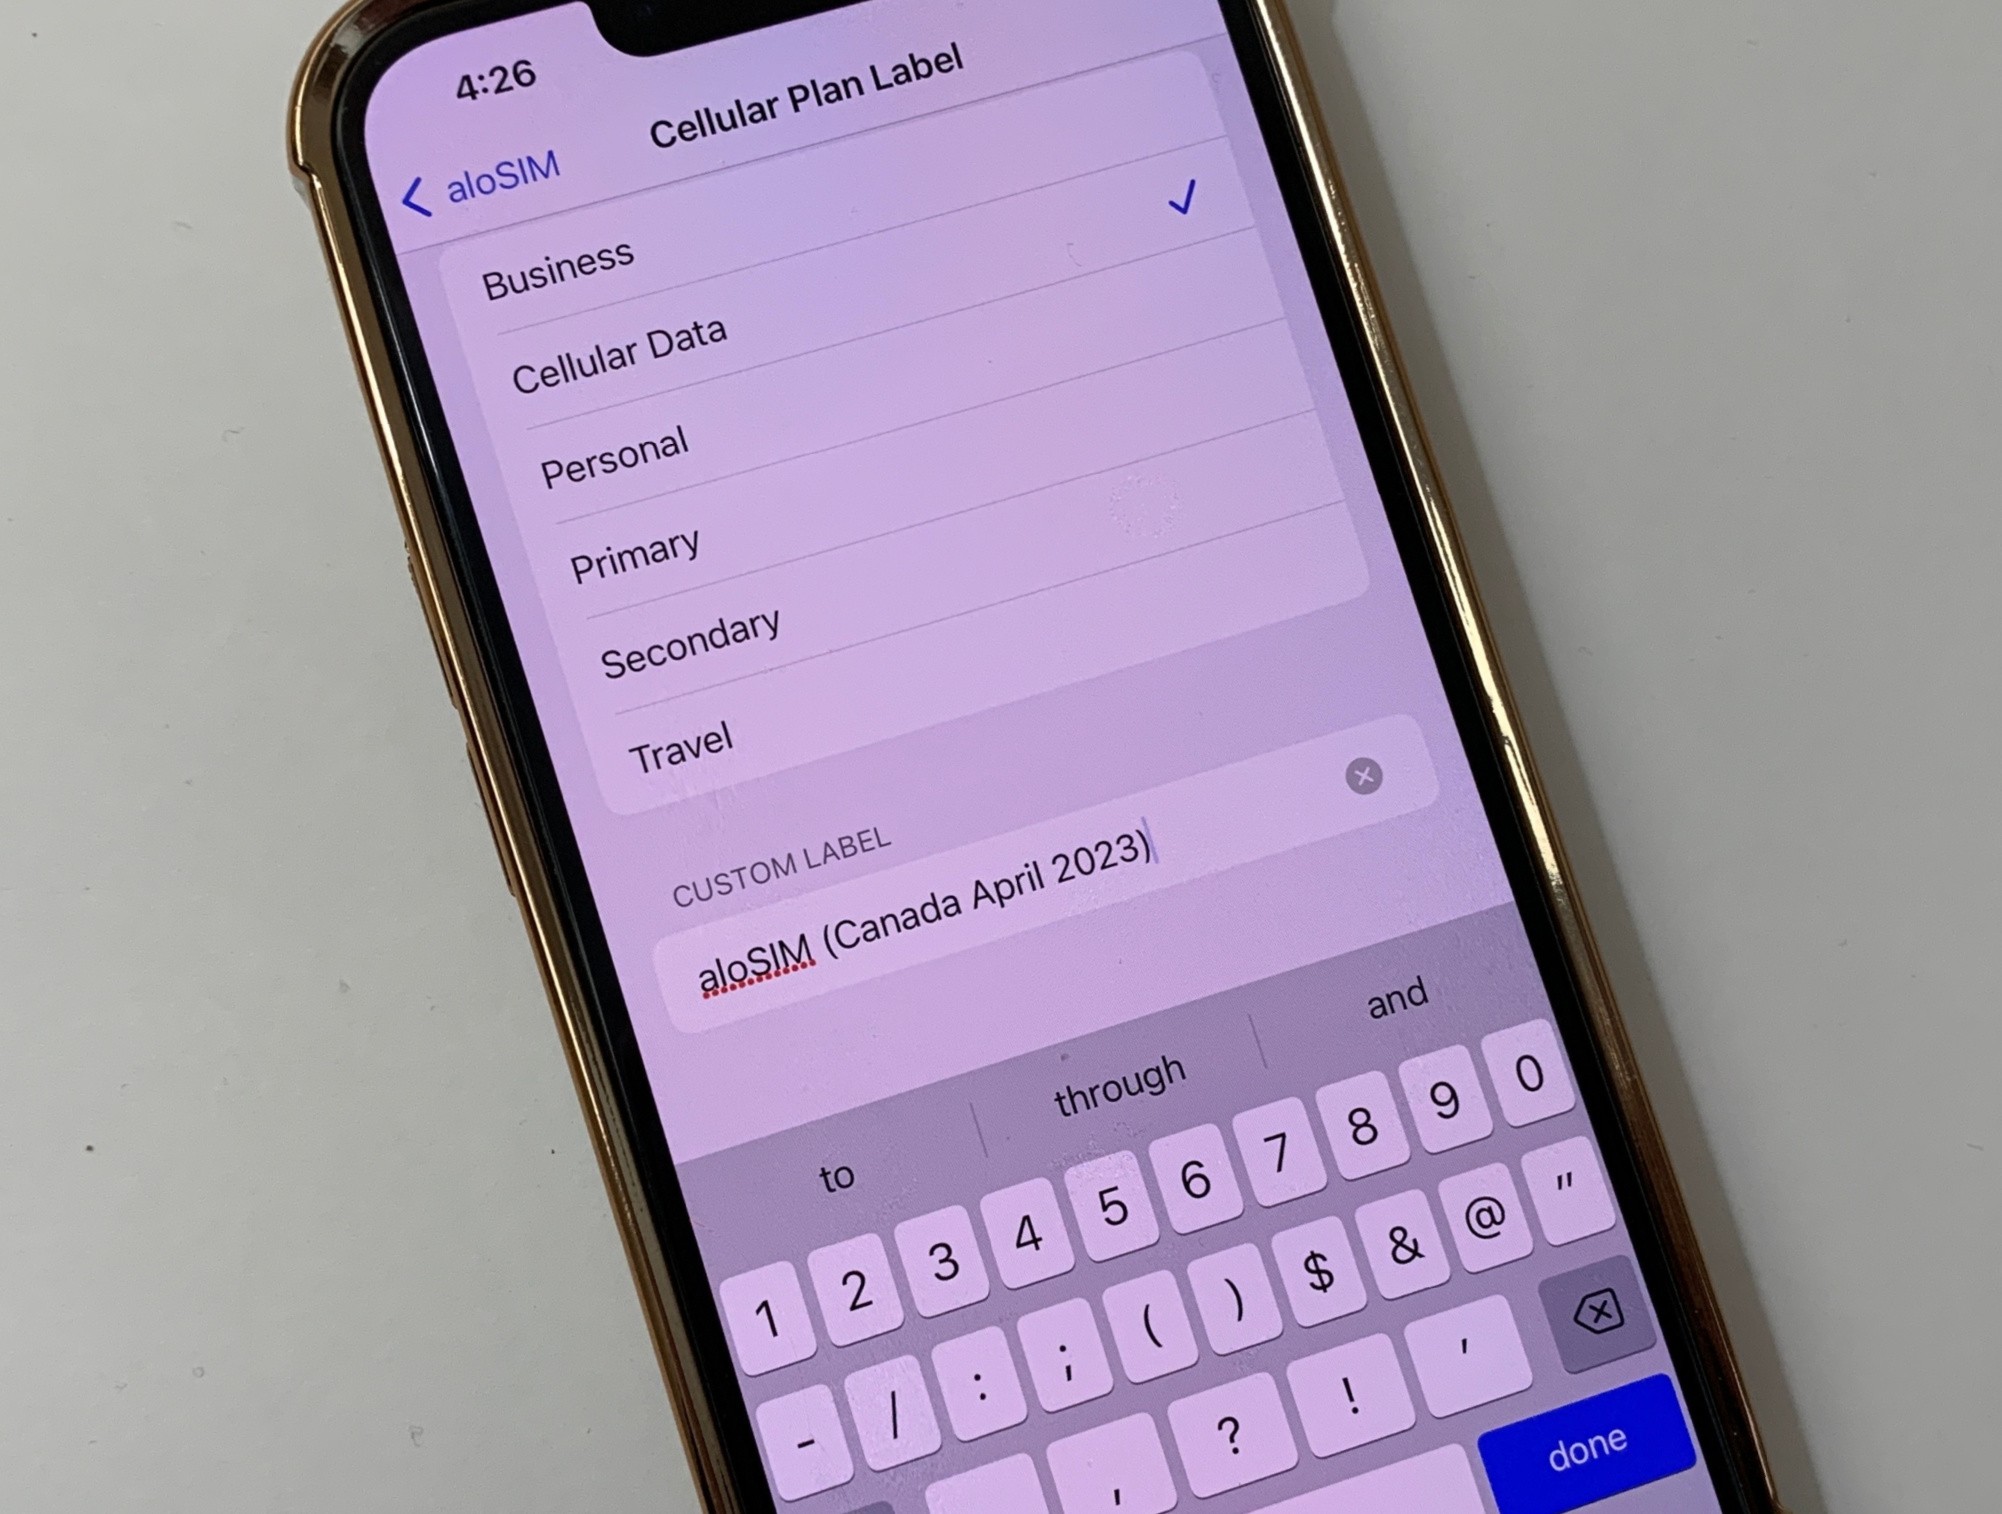
Rename your eSIM (recommended)
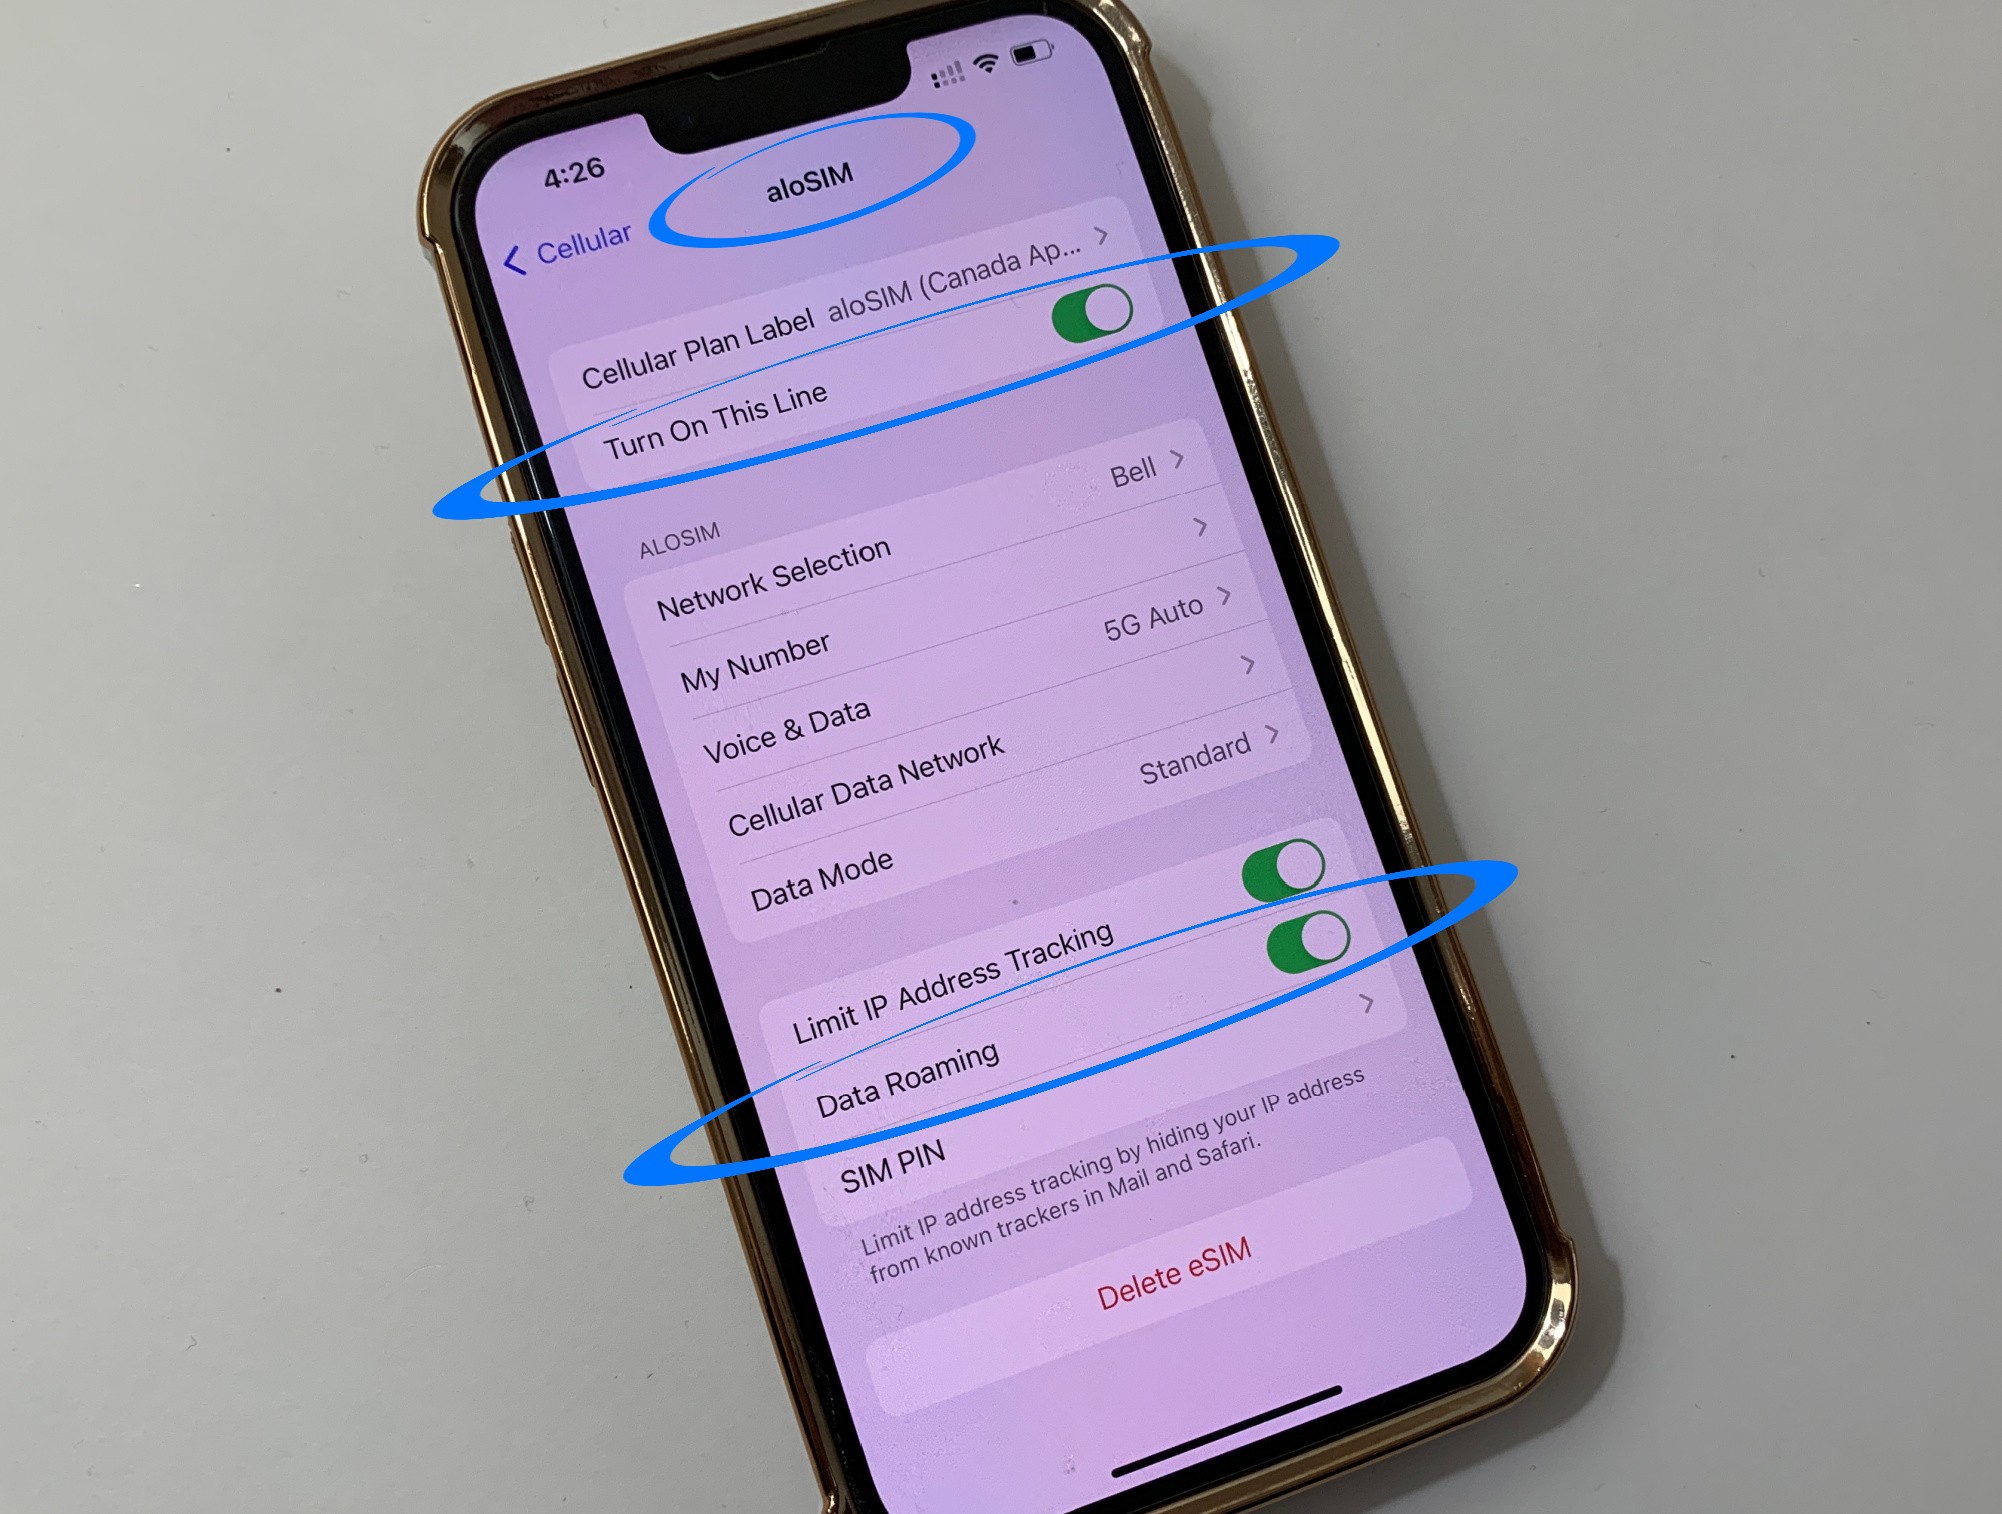
It’s a good idea to give your eSIM a custom name, or it can get confusing if you’re switching between eSIMs for multiple countries and regions. Tap “Cellular Plan Label” to give it a name.
Settings > Cellular > Your eSIM > Cellular Plan Label
Turn on your eSIM, let it roam
We need your eSIM to be switched on and allowed to “roam.” This will only activate your data package if you’re already located in the correct country or region. By doing this when you’re still at home, you’ll be closer to an instant connection when you land in the correct country or region.
Settings > Cellular > Cellular Plans > Your eSIM > Turn Data Roaming “ON” and toggle Turn on This Line “ON”
Make sure your eSIM APN is "alosim"
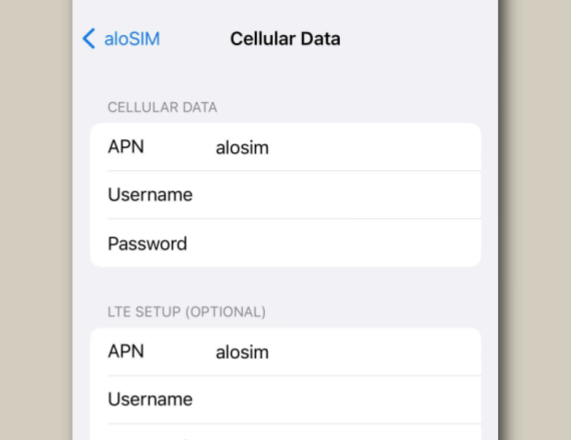
Your eSIM APN (Access Point Name) was likely set up automatically when your eSIM was installed, but it’s still a good idea to check that it says “alosim” in the Name and APN fields.
Settings > Cellular > Your eSIM > Cellular Data Network > Make sure it says “alosim” in the Name field and “alosim” in the APN field
Make sure iMessage can use email
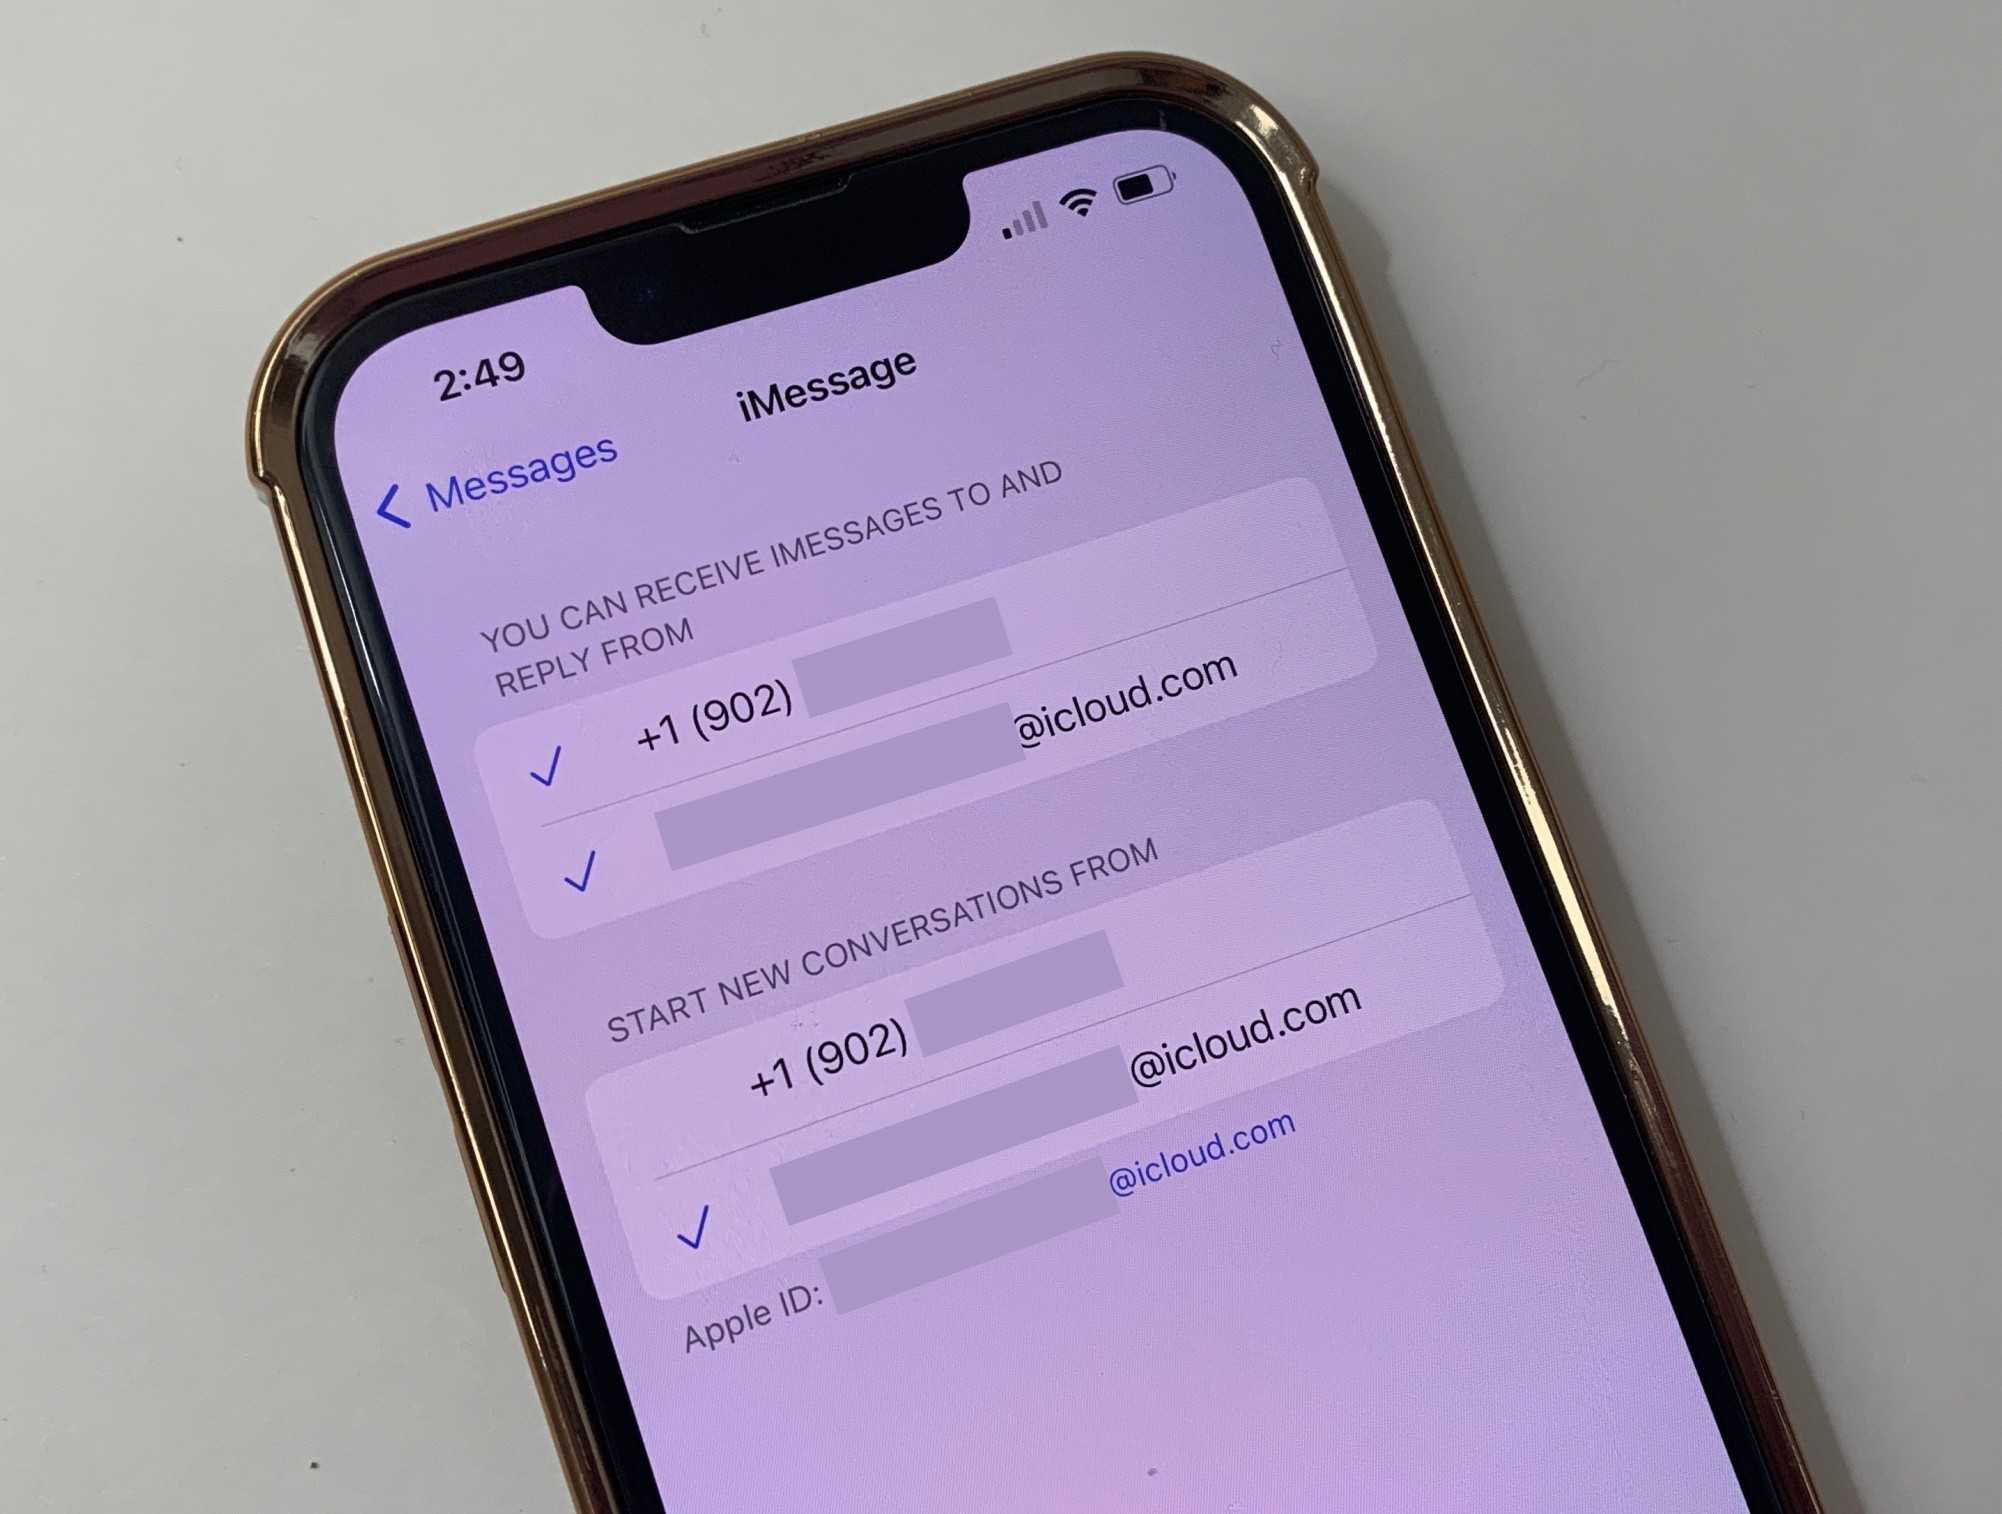
Since your regular phone number won’t be active while you’re travelling, now is a great time to make sure iMessage is connected to your Apple ID email address. Then you can still send and receive iMessages over Wi-Fi or data.
Settings > Messages > iMessage > Make sure your Apple ID email address is checked off for receiving and replying to messages, as well as starting new conversations
Make sure FaceTime can use email
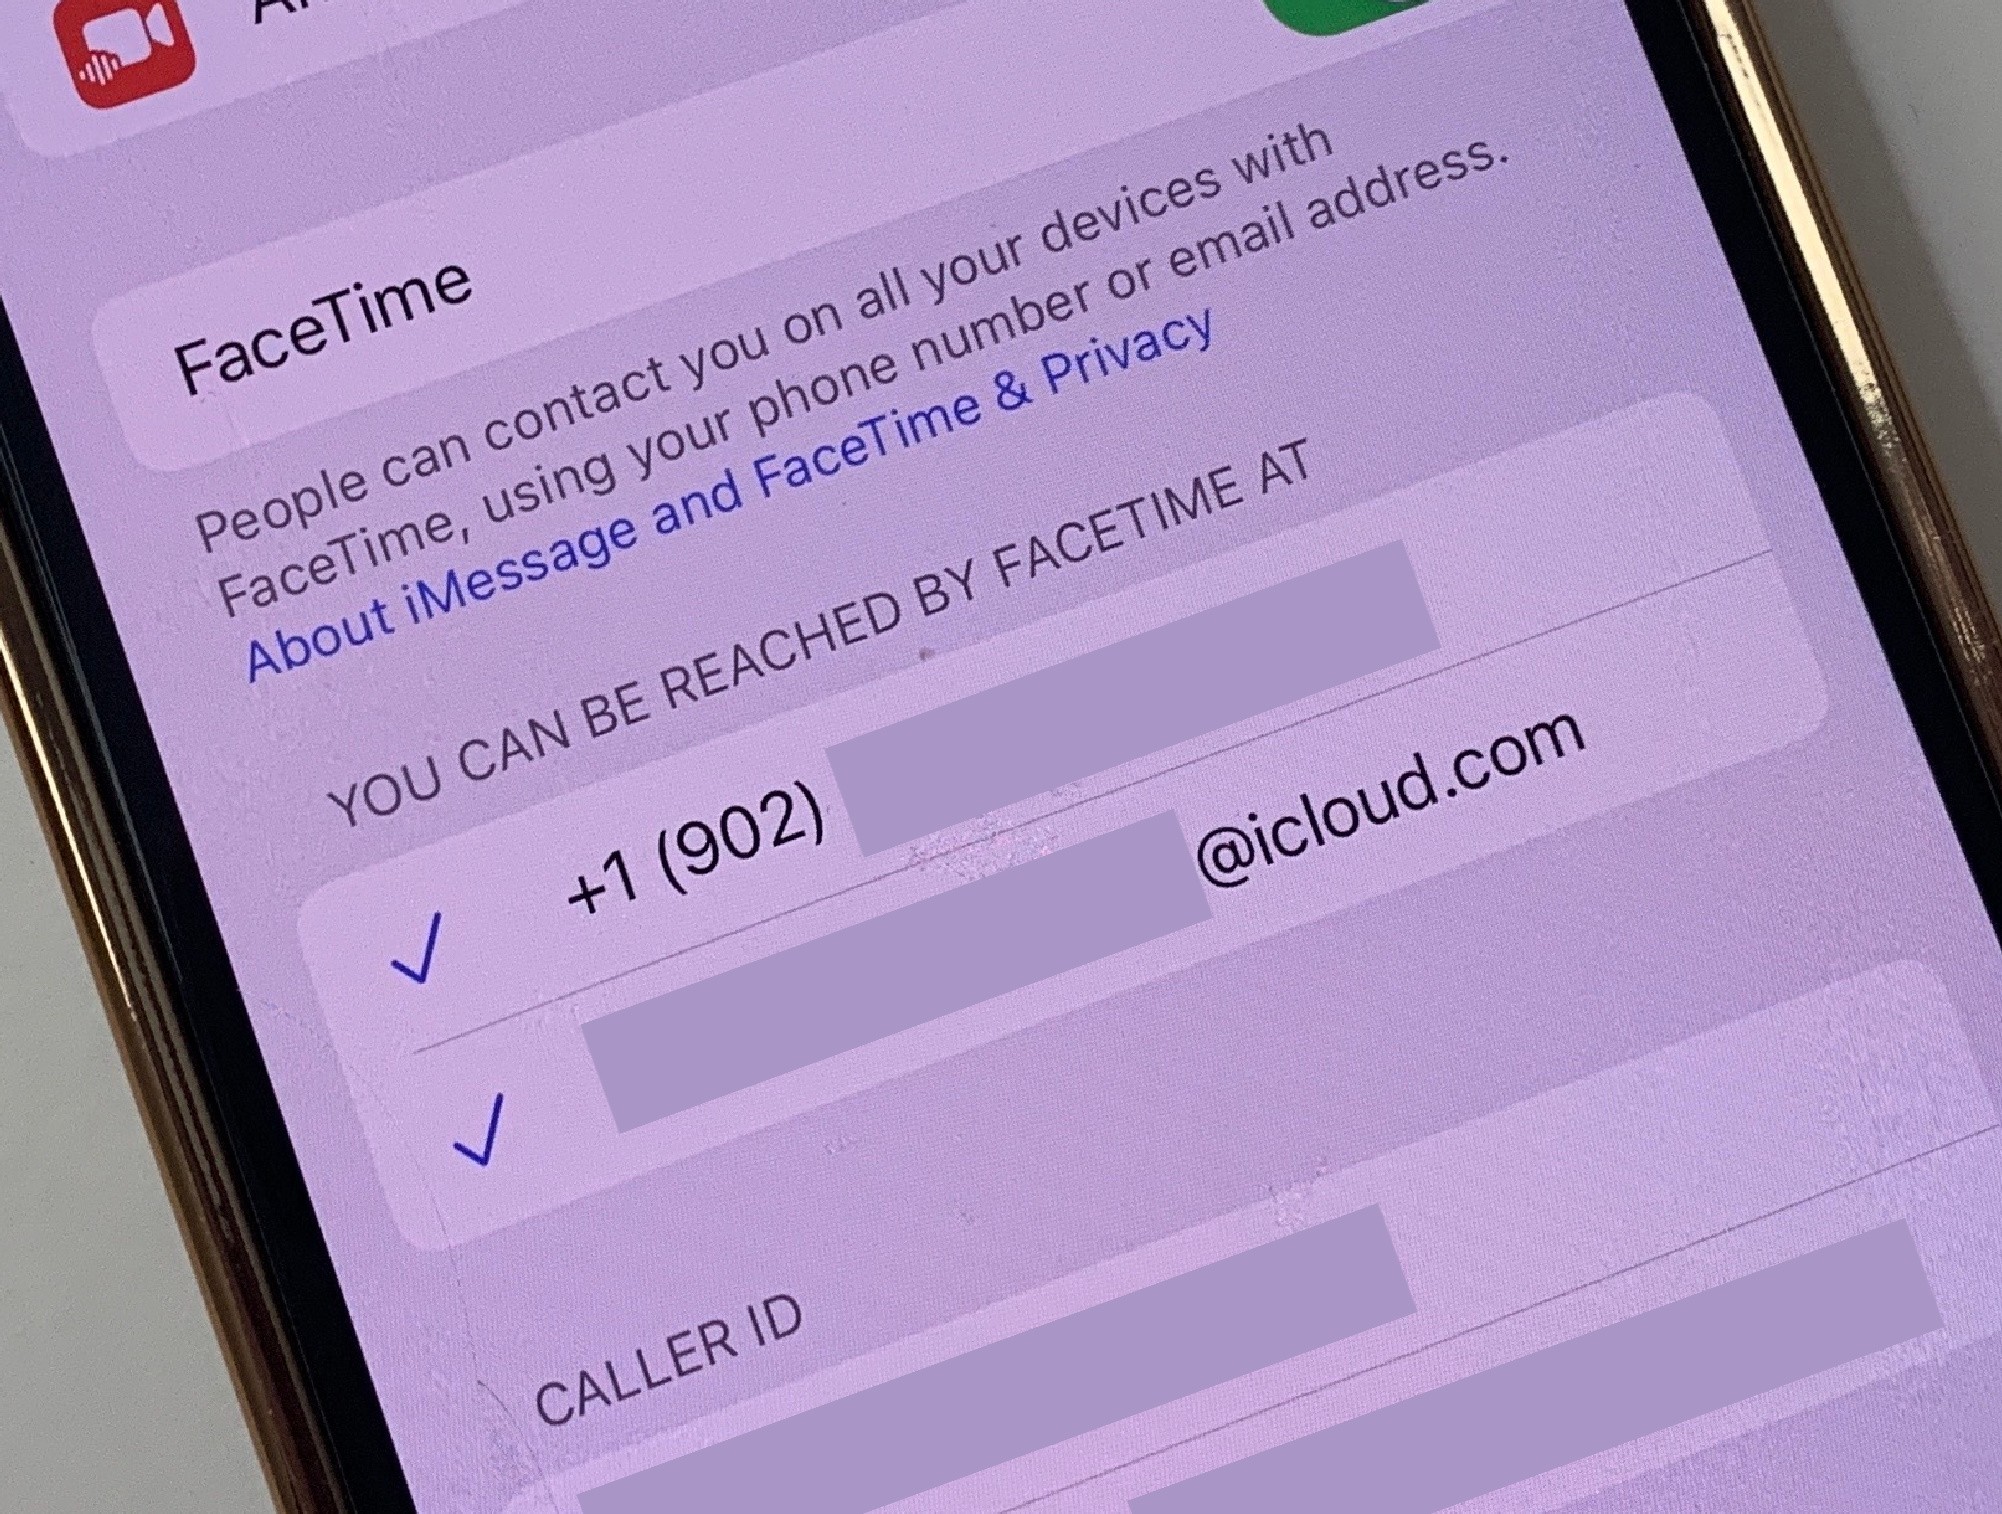
If you plan on making or accepting video calls with FaceTime, make sure FaceTime is connected to your Apple ID email address, too. Then you will be able to use FaceTime without your phone number.
Settings > FaceTime > Make sure your Apple ID email address is checked off
Right before international travel ...
Now that you’ve already purchased a eSIM data package, installed your eSIM, and completed the preparation steps above, you’re going to prepare your device to use your data soon as you arrive in the correct country/region.
These next steps should ONLY be completed right before you leave the country (when you’re about to board an airplane, cross a border, etc.)
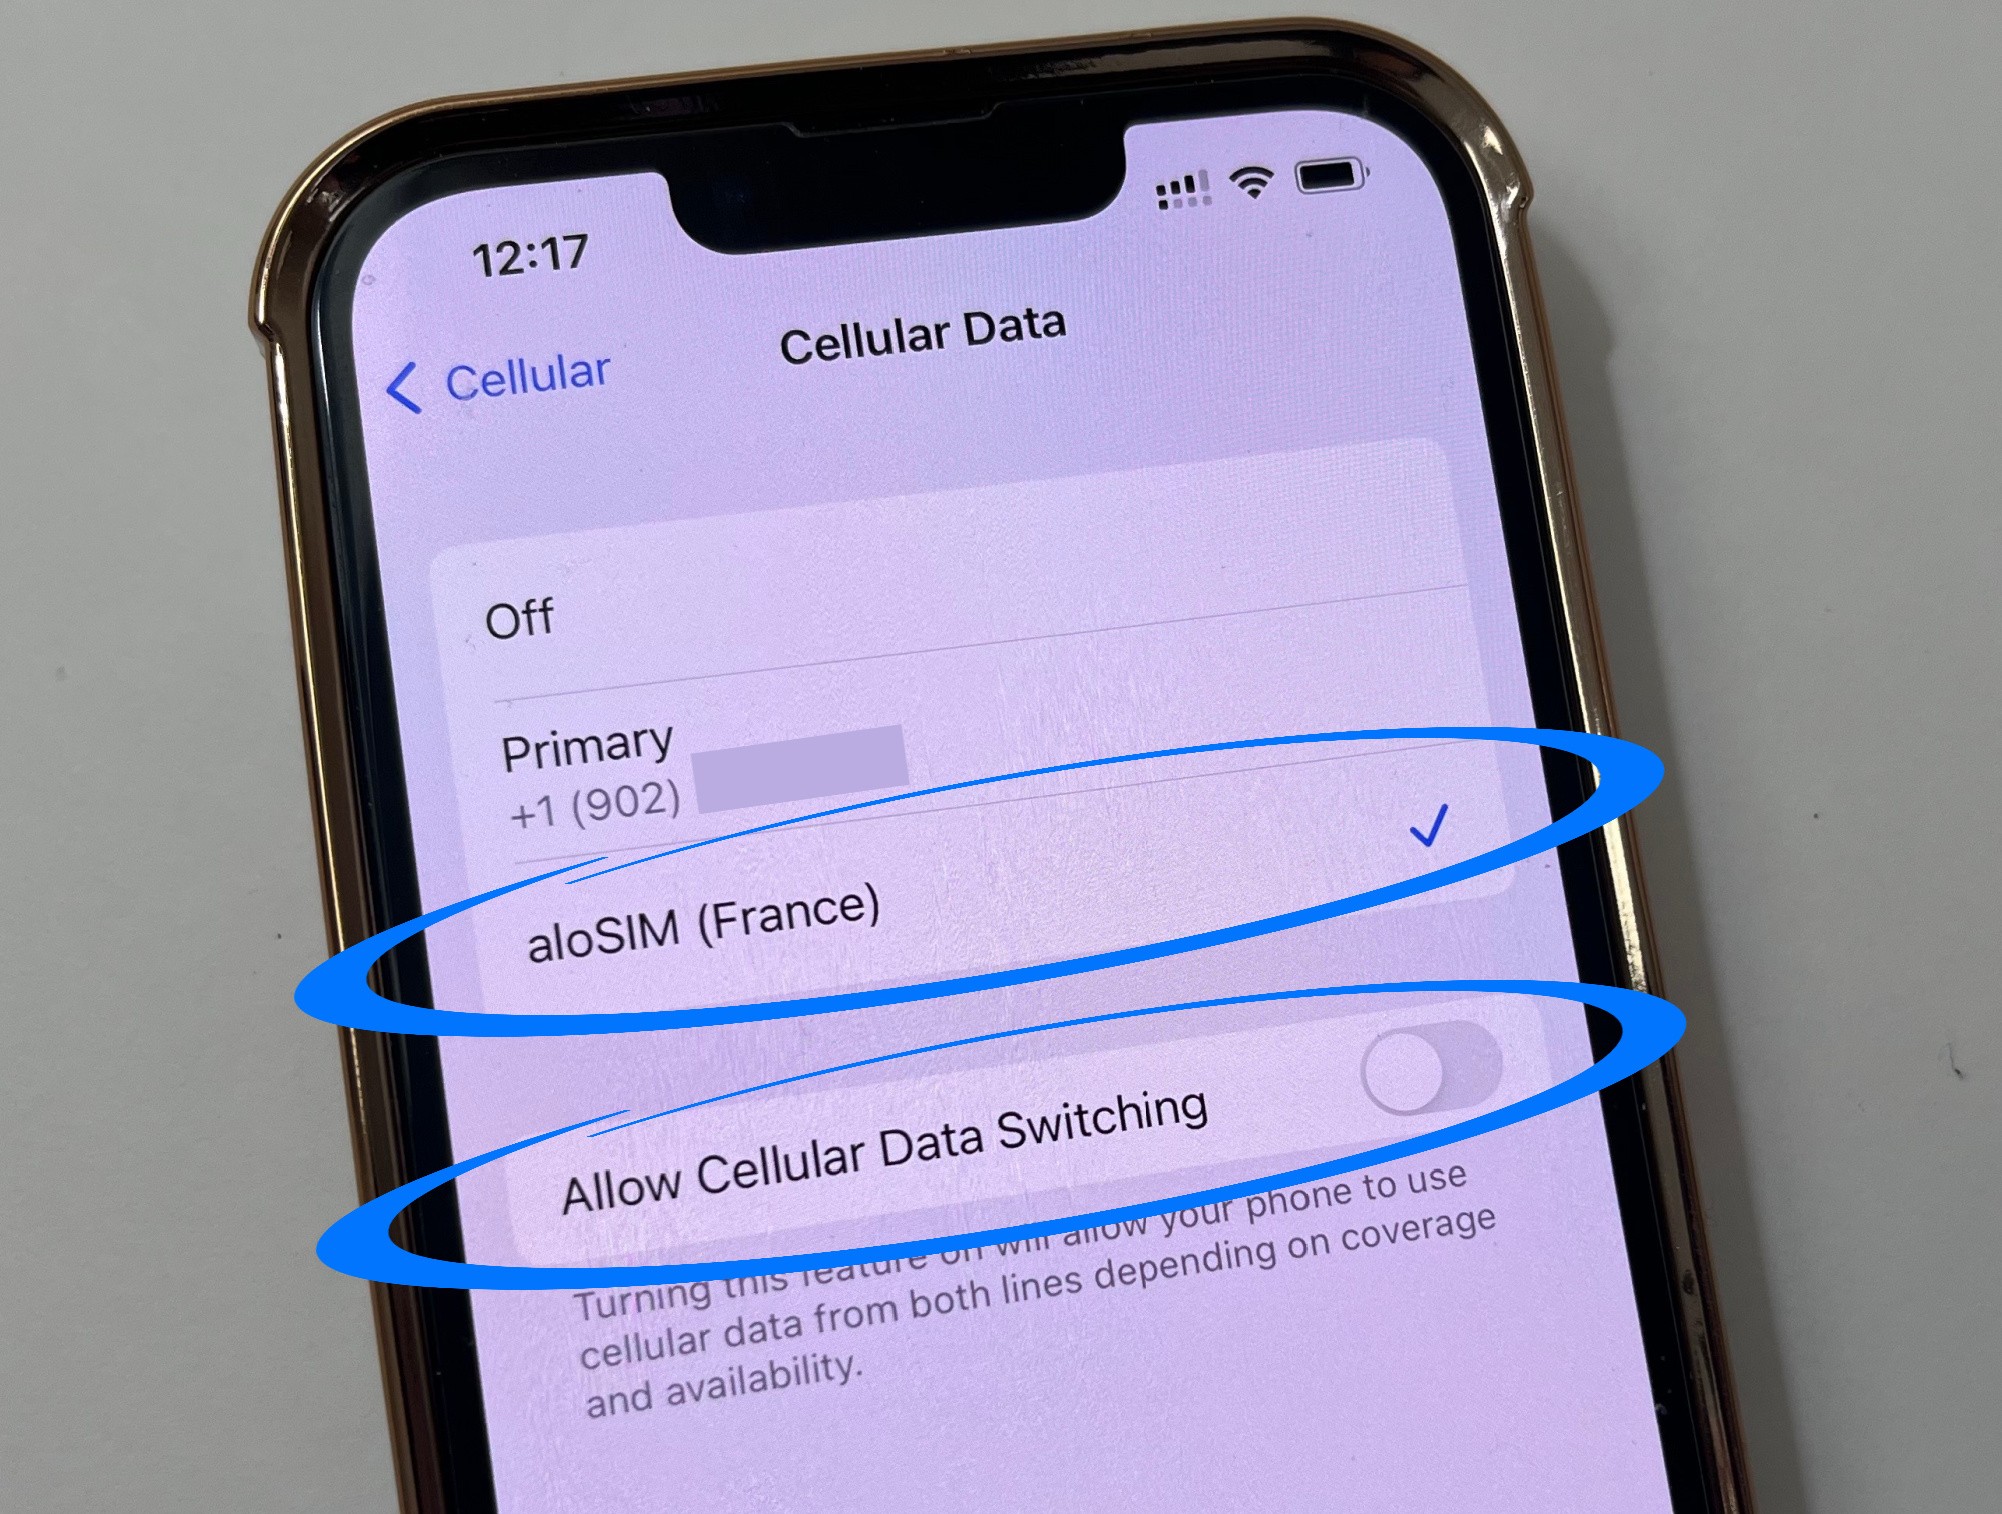
Choose aloSIM for all data usage
This setting tells your iPhone to start using your eSIM for all data as soon as you arrive in the correct country/region, and not to ever switch between your eSIM and your Primary data plan.
Settings > Cellular > Cellular Data > Select your eSIM and make sure “Allow Cellular Data Switching” stays “OFF”
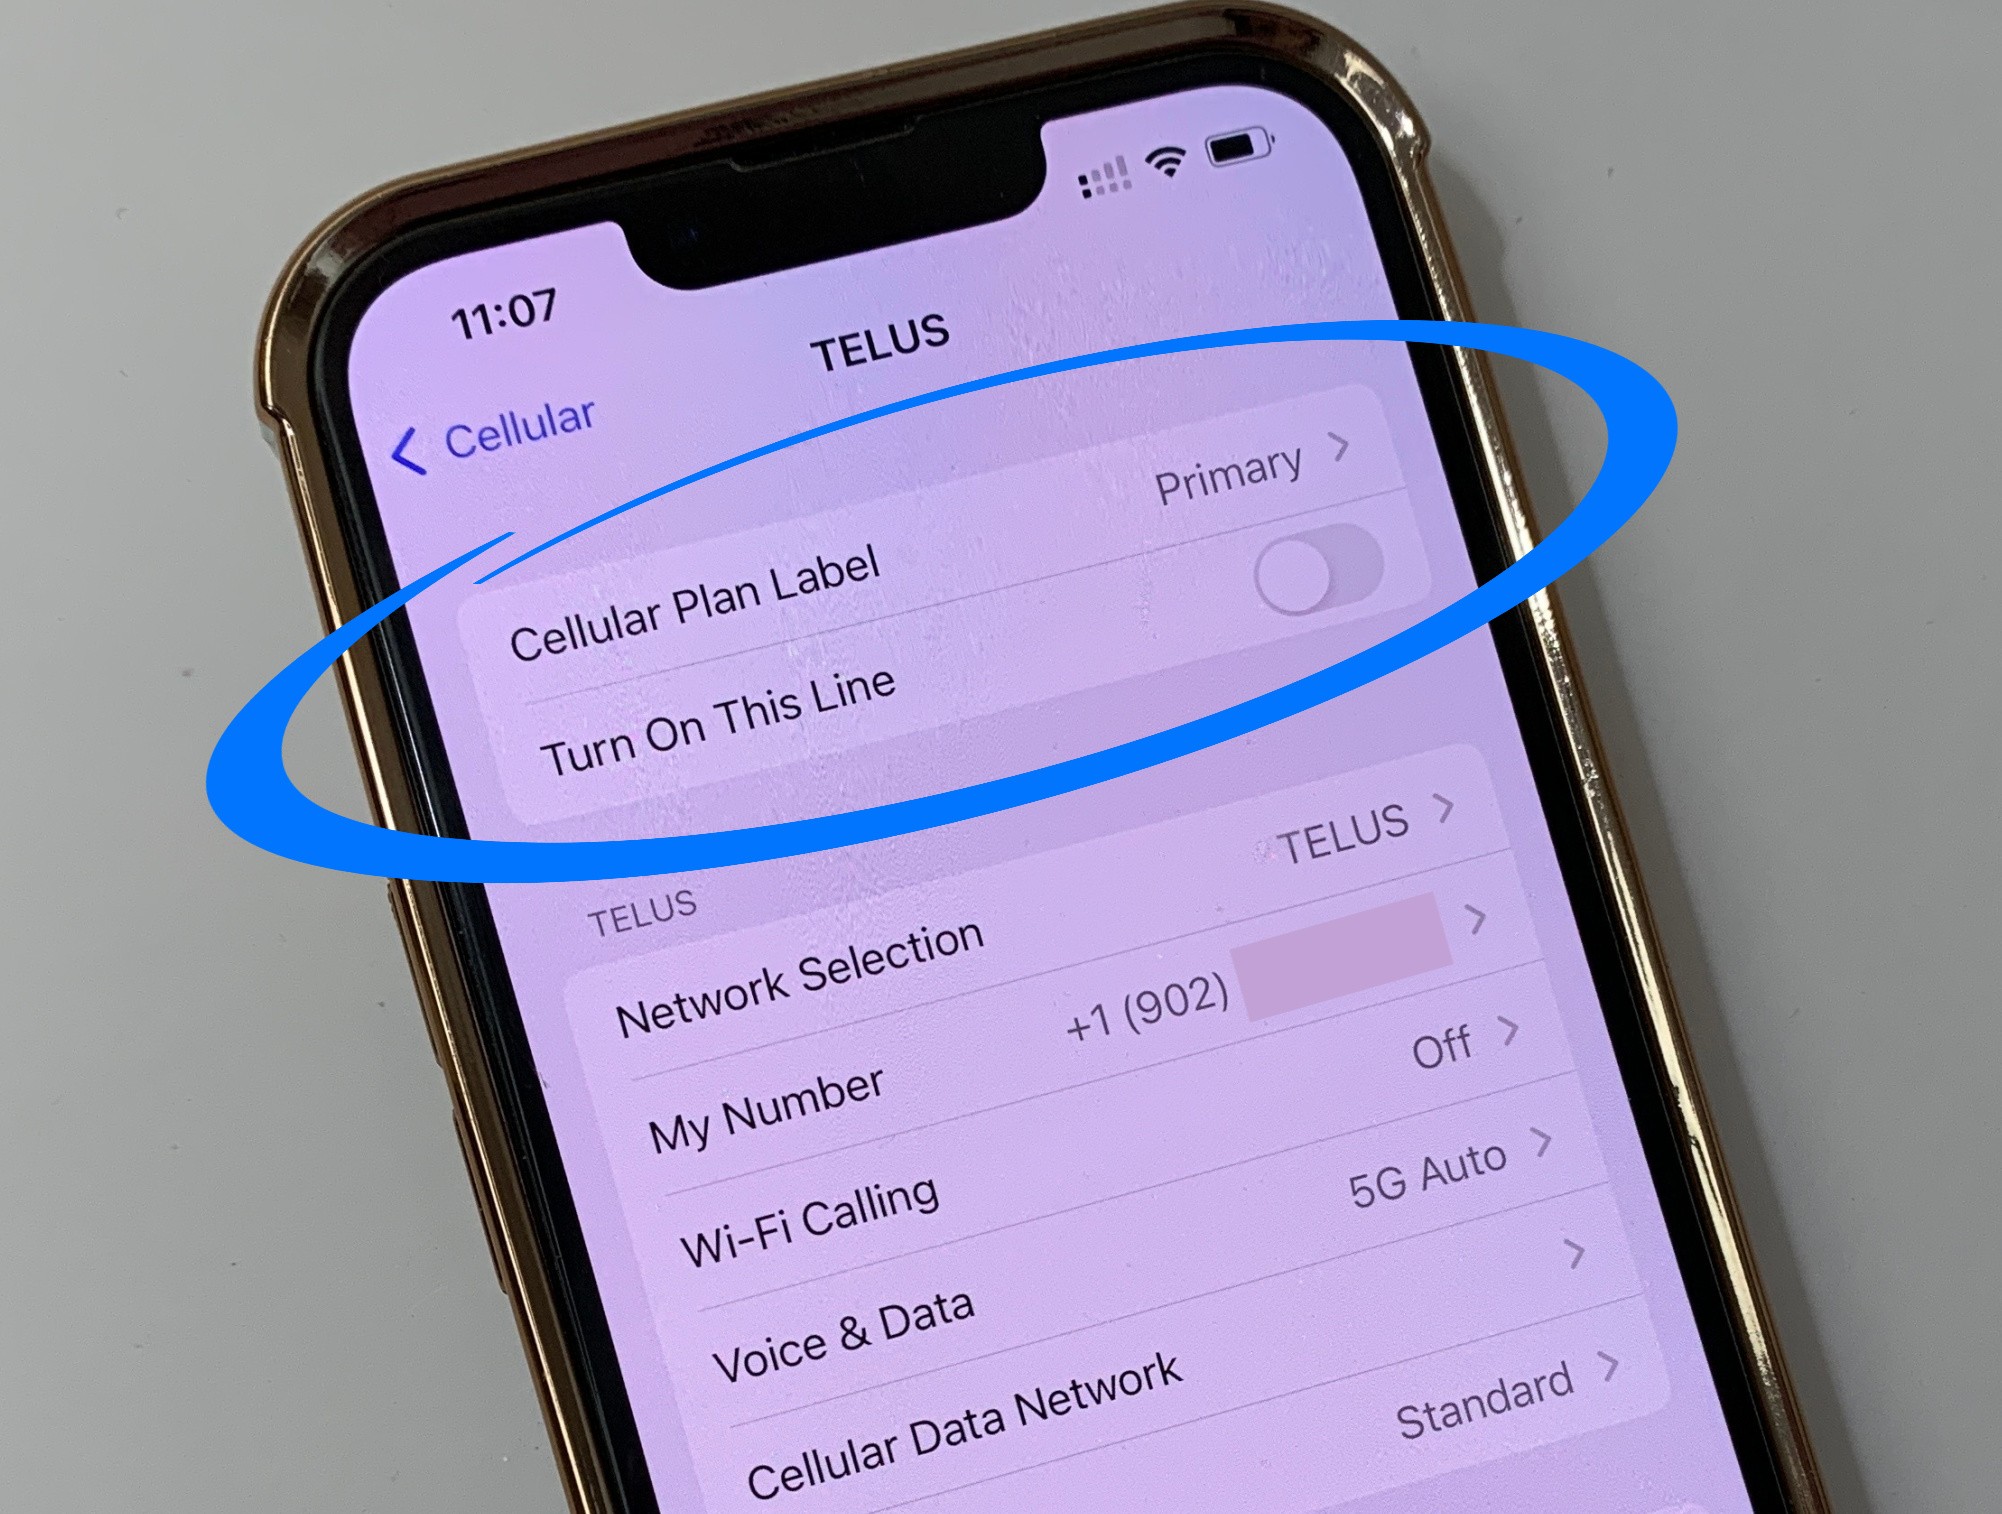
Turn your Primary SIM off
If you don’t want to use your regular phone number for a while (to avoid calling and texting fees while travelling internationally), toggle your Primary SIM off so it can’t be used for calling or texting.
Settings > Cellular > Cellular Plans > Primary > Toggle “Turn On This Line” off
When you arrive in the new country ...
Welcome! Now that you’re on international soil, those steps (above) that you’ve already completed should mean your eSIM data starts working right away …
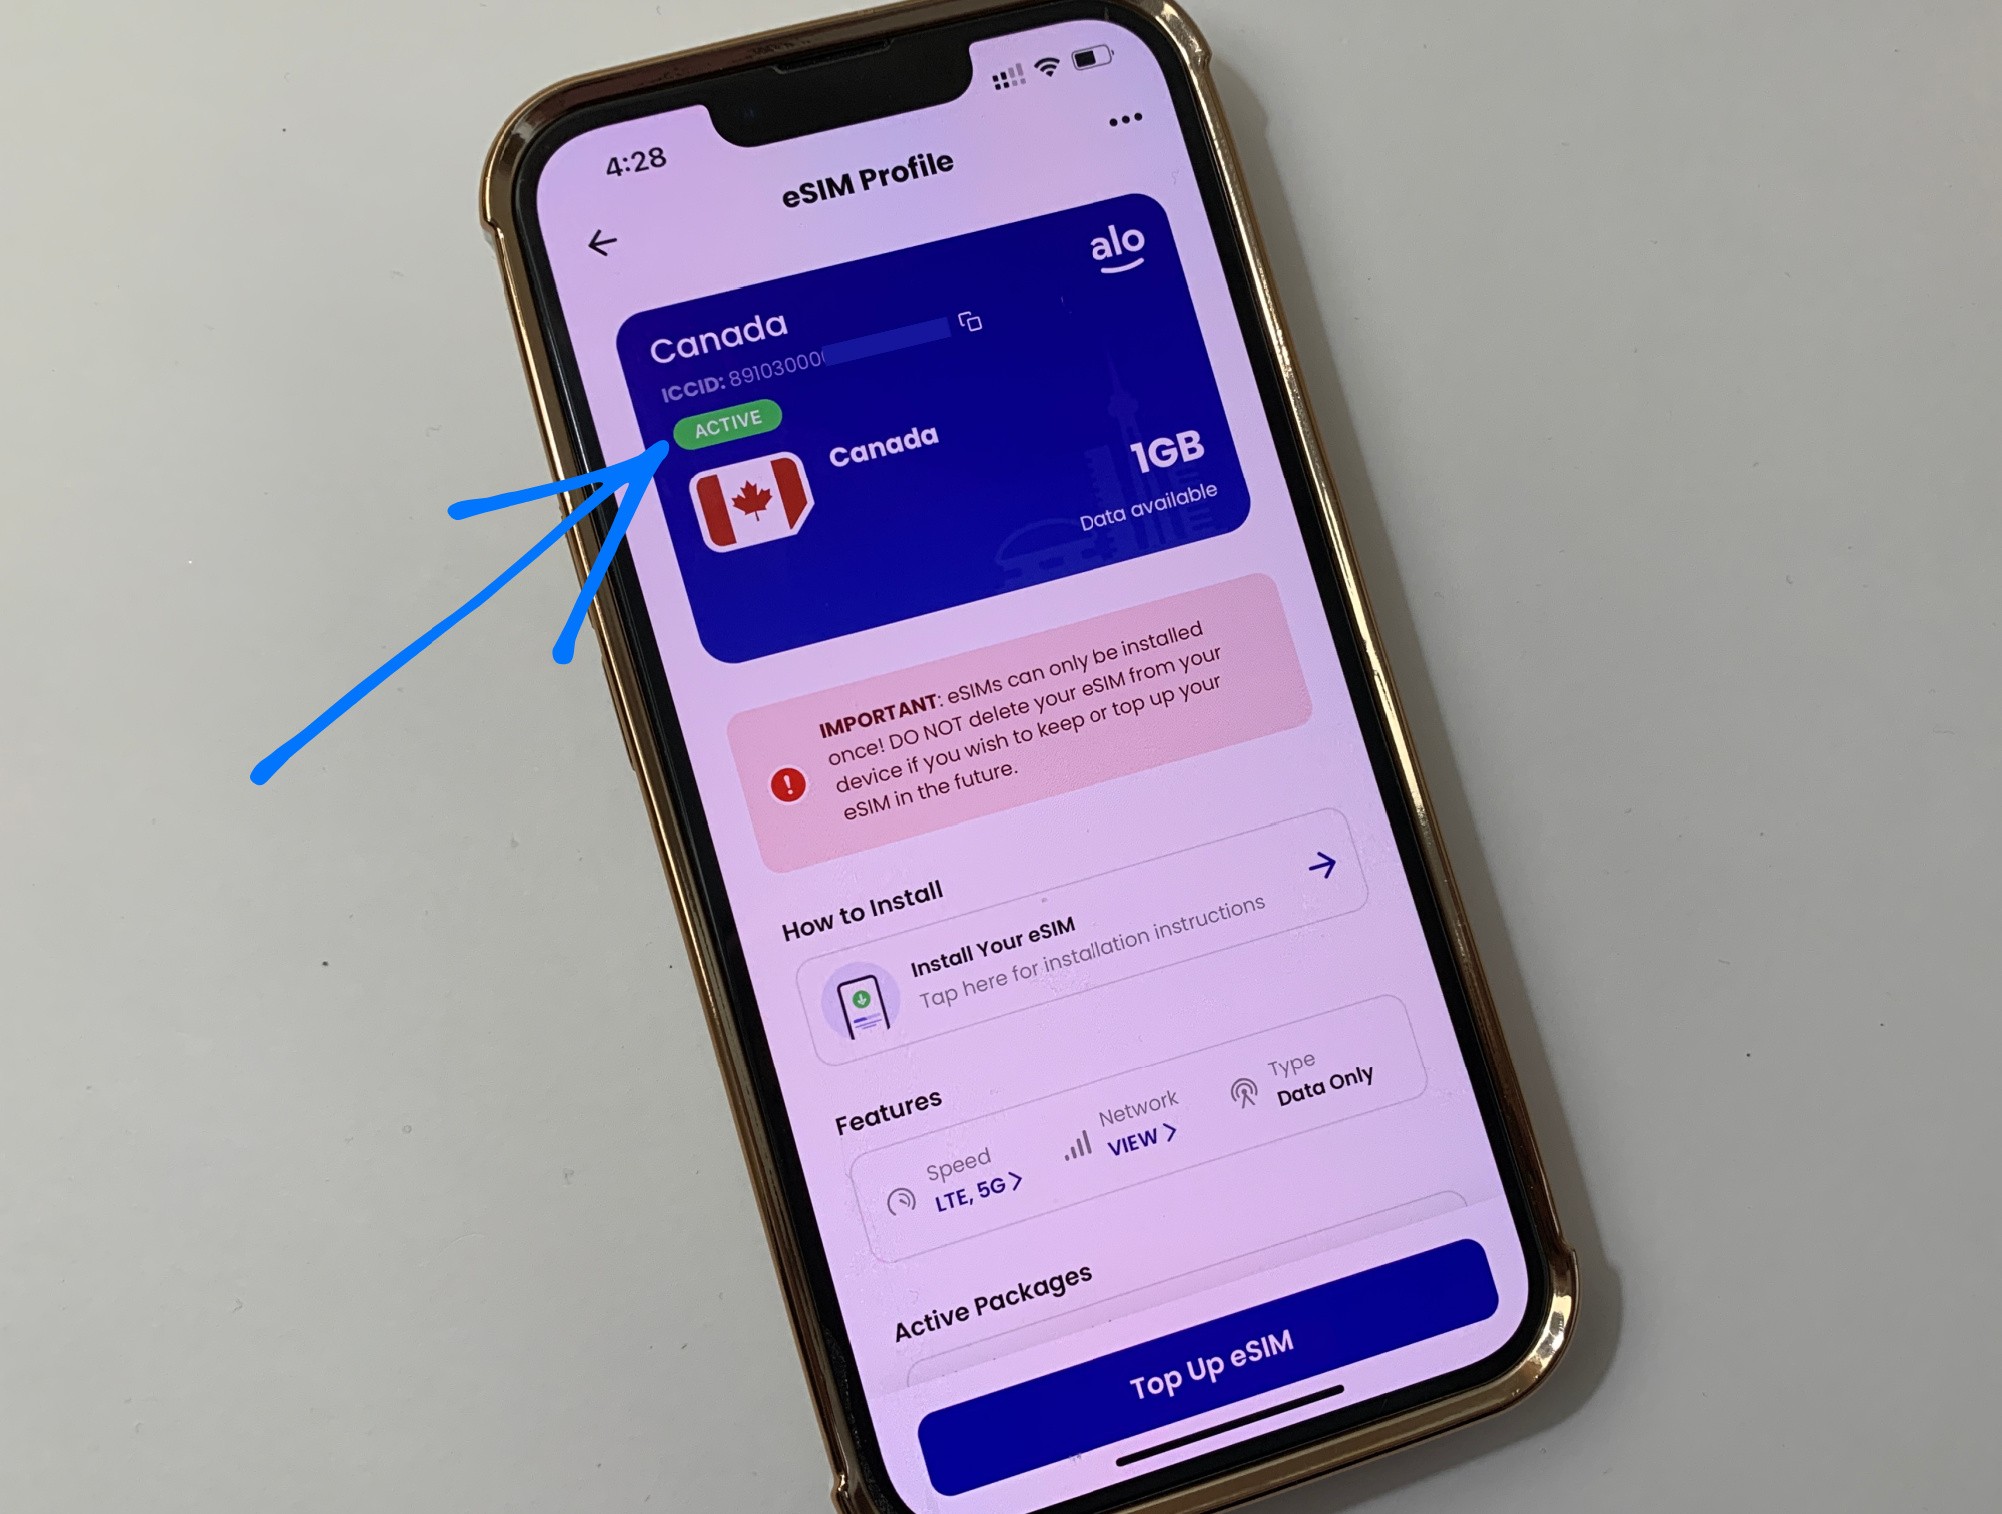
Check the eSIM in your aloSIM app
Your iPhone eSIM data package should automatically be active because it’s able to connect to a local network. If you log into your aloSIM account and tap on your eSIM, it should show a green “ACTIVE” bar. If not, tap the blue “ACTIVATE” button below.
Log into aloSIM > Tap your eSIM > See if it says “ACTIVE”
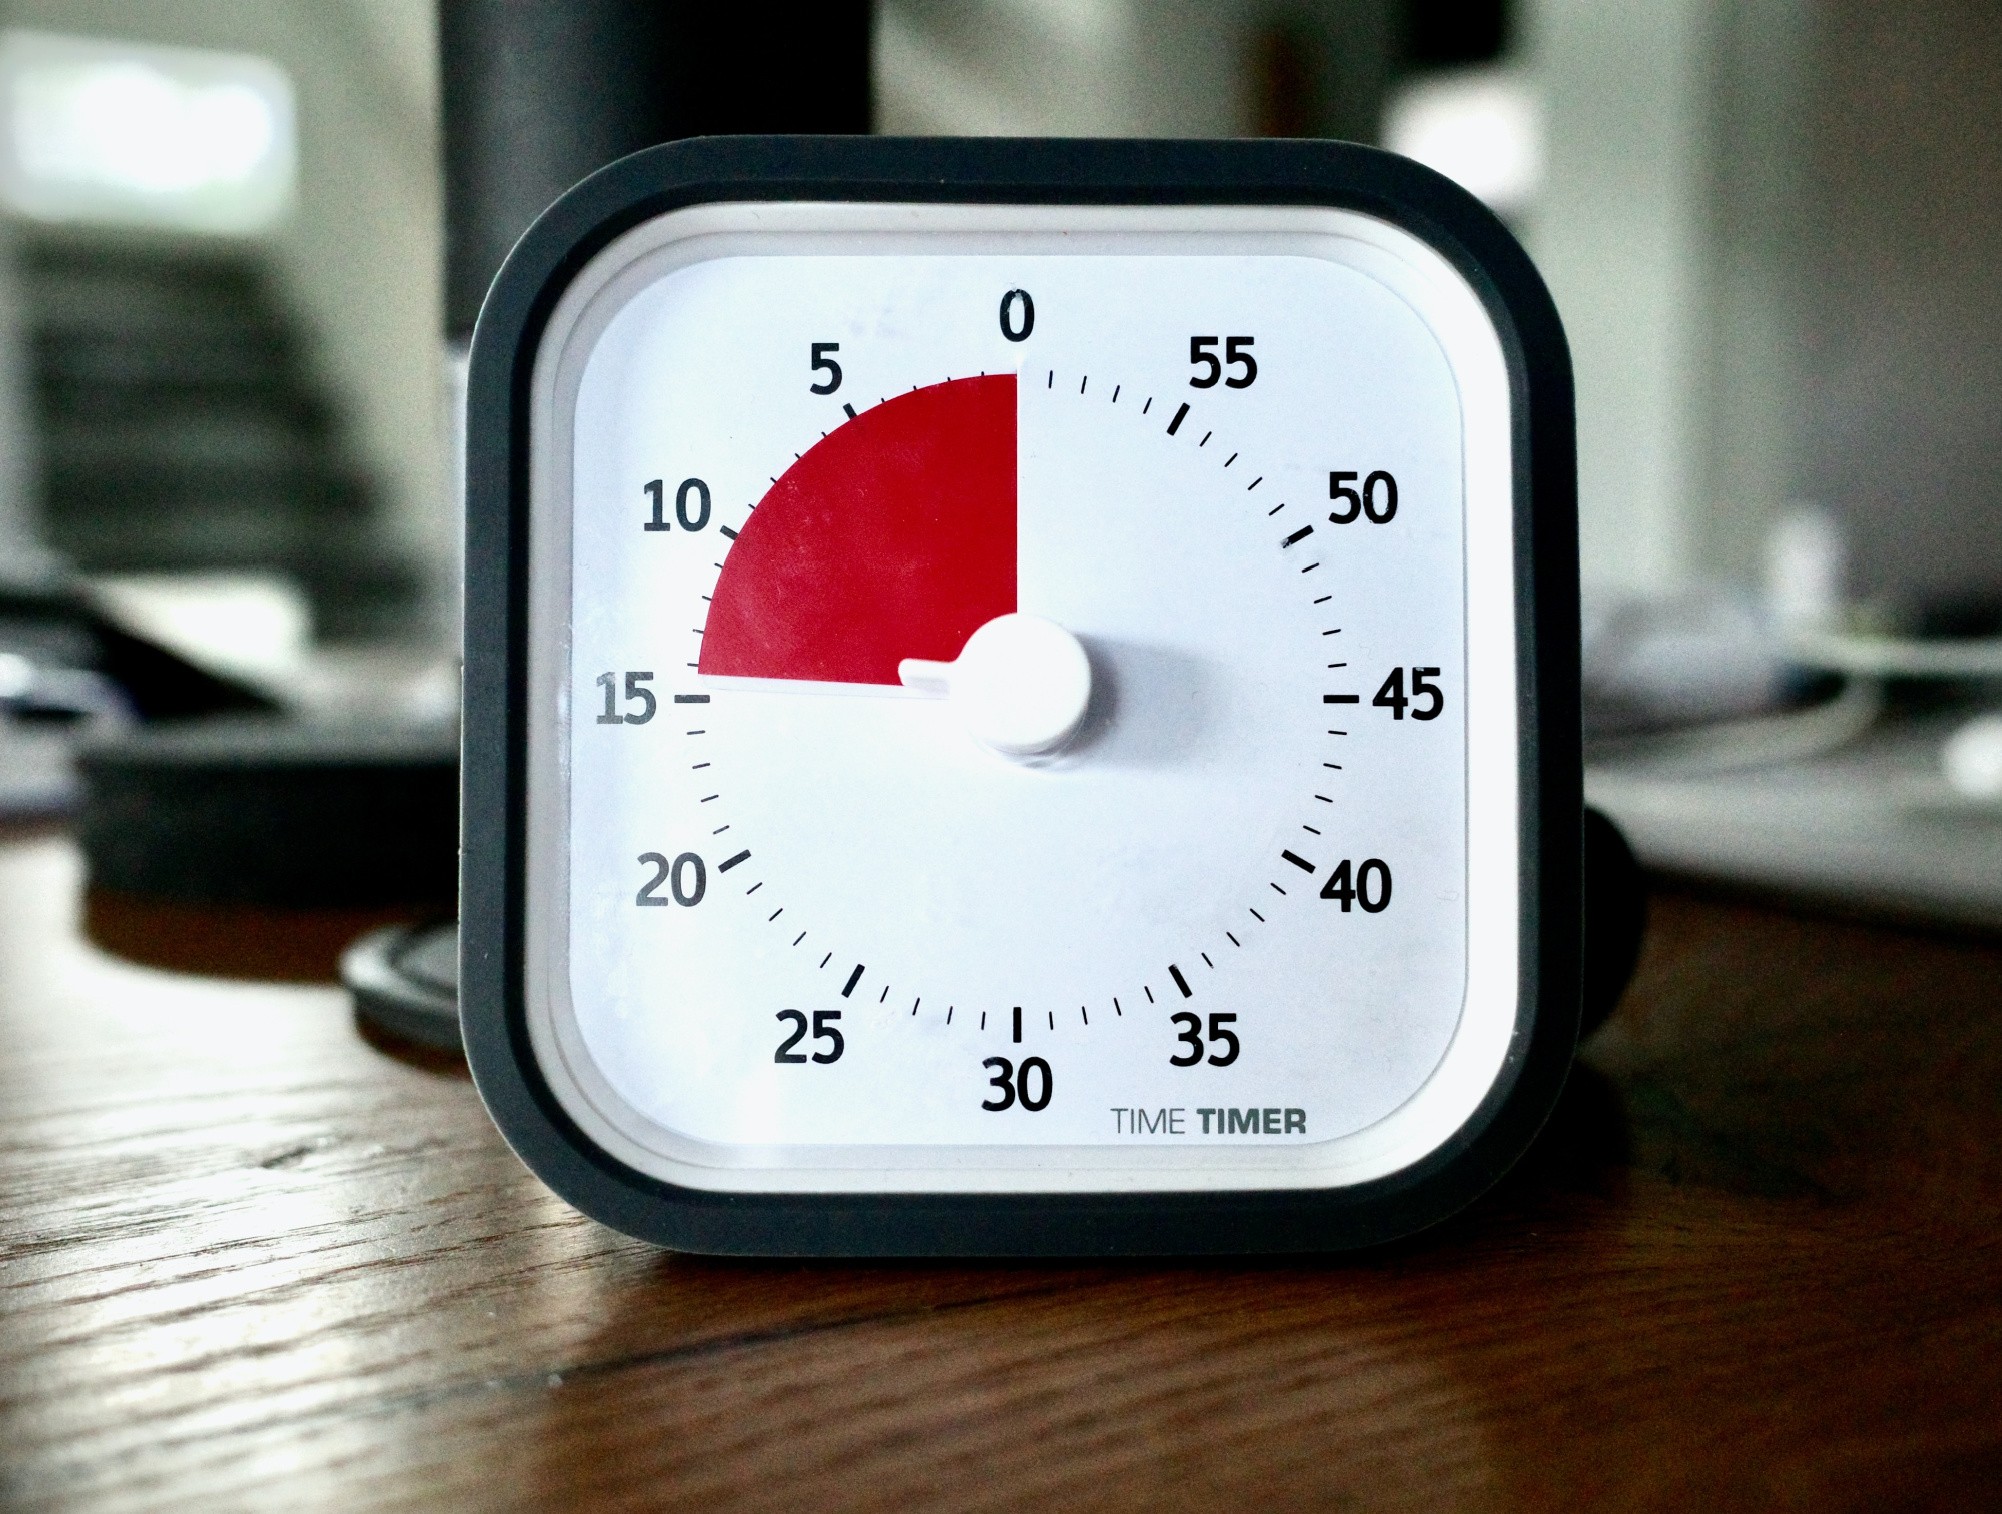
Your connection may take a few minutes
Depending on your device and your physical location, your eSIM might take up to 15 minutes to connect to a local supported network. After completing the above steps, please make sure Airplane Mode is off and that you’re not on Wi-Fi. Wait a few minutes to see if your eSIM will connect. You can test this by opening an internet browser and doing a test search.
Decide you want your phone number on?
If you change your mind and decide you’d rather have access to your regular phone number while you’re away, please walk through these steps so your iPhone is set up to use eSIM for data while keeping your regular phone number available for calls and texts.

Need help? We're always here!
If you have completed the steps above, but your data doesn’t seem to be working yet, please contact aloSIM Technical Support via email (support@alosim.com), in-app chat, or live chat on aloSIM.com.
Need help? aloSIM’s Support team is available 24/7 if you have questions about any part of the iPhone eSIM activation process.
Need prepaid data for your iPhone?
aloSIM has eSIM data packages for 200+ countries
Questions about using eSIM with your iPhone?
Our friendly aloSIM Technical Support team is available 24/7 via email (support@alosim.com) and live chat.

