Have you taken your Google Pixel eSIM capabilities for a spin yet? An eSIM is a digital SIM card, and most newer Google Pixel phones already support eSIM. If you haven’t tried it yet, you’re definitely going to want to try this easy, affordable way to get steady mobile data in 120+ countries with NO roaming charges.
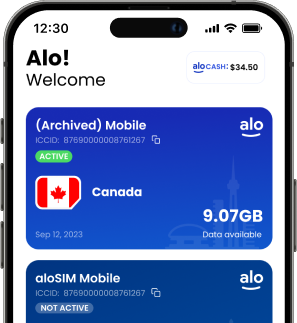
Using our free aloSIM app, our customers follow our Google Pixel eSIM installation instructions easily, which puts their new digital SIM card directly on their phone, so it’s ready to use. With a Google Pixel, you’ll be able to choose from a QR code eSIM installation or a Manual eSIM installation.
RELATED: How to install eSIM on a Google Pixel
But when it’s time to use your new eSIM and get the data flowing, sometimes people are a little confused about how to activate an eSIM and begin using the data. So today we’re going to explain all the different eSIM settings you might encounter, and show you exactly how to set them on your Google Pixel phone.
1. Mobile networks
WHAT IT MEANS: This is where you can turn SIMs (both SIM cards and eSIMs) on and off
WHERE TO FIND THIS ON YOUR GOOGLE PIXEL: Settings / Network & Internet / Mobile Networks
CORRECT GOOGLE PIXEL eSIM SETTING: Make sure your aloSIM eSIM is switched ON so it can work
2. Data Roaming for aloSIM
WHAT IT MEANS: Roaming means being allowed to connect to different networks, and you want your Google Pixel to be able to connect to the networks aloSIM supports
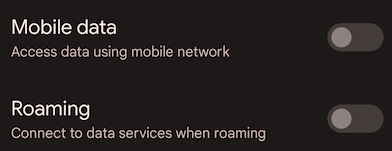
WHERE TO FIND THIS ON YOUR GOOGLE PIXEL PHONE: Settings / Network & Internet / Mobile Networks. Select aloSIM and scroll down to see “Mobile data” and “Roaming”
CORRECT GOOGLE PIXEL eSIM SETTING: Make sure “Mobile data” and “Roaming” are both toggled ON when you’re using aloSIM, so we can connect you to the best local network.
3. APN (Access Point Name)
WHAT IT MEANS: This is a setting that might be configured automatically, BUT sometime it isn’t (it depends on your device) so it’s a good idea to check it to make sure your data will work properly
WHERE TO FIND THIS ON YOUR GOOGLE PIXEL PHONE: Settings / Network and Internet / Advanced / Access Point Names
CORRECT GOOGLE PIXEL eSIM SETTING: Make sure the APN has “alosim” in the Name field, as well as in the APN field.
If your APN isn’t aloSIM, you’ll tap the three vertical dots in the top-right corner, and create a new Google Pixel APN by selecting “New APN.” Then you can type “alosim” in both the Name and APN fields, and save your changes.
4. Data Roaming for your Primary SIM
WHAT IT MEANS: In order to avoid roaming charges on your Primary SIM (if you have one) from back home, you need to tell your device *not* to roam on your Primary plan while you’re using aloSIM (since you’re probably traveling internationally).
WHERE TO FIND THIS ON YOUR GOOGLE PIXEL PHONE: Settings / Network & Internet / Mobile Networks. Select your Primary SIM and scroll down to see “Mobile data” and “Roaming”
CORRECT SETTING: Make sure “Mobile data” and “Roaming” are both toggled OFF when you’re using aloSIM for data, so you aren’t charged roaming via your regular phone carrier. (If you don’t have a primary data plan, you don’t have to worry about this step.)
NOTE: You can keep your Primary SIM toggled on while traveling in order to receive calls and texts on your regular phone number, but be aware that your primary carrier will charge you for active call minutes and individual texts. Additional fees may apply, so speak to your carrier ahead of your trip if you plan on leaving your Primary SIM on.

If you’re having any trouble setting up your Google Pixel eSIM, please head over to our eSIM Support section so we can help you out.


