Winter is coming. Every day those snowflakes threaten to fall. Is it time to escape to the south? Or maybe time to embrace the snow and jet off to a ski resort getaway. If you’re planning your next holiday and want to keep roaming fees out of your travel budget, it’s no contest: eSIMs are the way to go.
If you’re unfamiliar with the concept, rest assured that understanding how to buy an eSIM online and set it up doesn’t need to be intimidating. With just a few simple steps, you can save money, stay connected, and only worry about catching your flight and packing the right clothes (it’s all about layers, people).
Here’s an easy-peasy guide for any beginner looking to buy eSIM online in Canada.
1. Where are you headed?
Step one before you dive too deep into shopping for an eSIM online, is to clarify your specific travel plans. Will you be visiting one country or are you heading to multiple destinations? Knowing this will help to pick an eSIM that best fits your needs, a plan tailored to regional travel or individual countries.
- If you’re flying out of Toronto to catch a cruise through the Gulf of Mexico with a few days stopping over in Texas for your Port of Call, you’ll want to take advantage of a North America eSIM, that covers all your stops
- If you are hopping on a flight to Spain to catch La Tomatina, then you’ll just need a single eSIM for Spain
2. How much data will you need?
Now consider how much data you might anticipate needing throughout your trip. Will you be depending on your phone for navigating around? Will you be posting much to social media? Or, will you only be checking it occasionally to read your emails or send a quick text.
Not sure? Try this handy data calculator to estimate your usage.
aloSIM offers a variety of data options, so it’s helpful to have an idea of what fits your needs. Remember: you can always top up your eSIM if you need to while you’re away.
3. Shop around a little
If you’ve settled on a destination and know your data needs, it’s time to compare prices and contrast providers. Many eSIM platforms, like aloSIM, offer plans designed just for Canadian travellers hoping to buy eSIM online.
Read some reviews and take a peek at what each plan offers in terms of:
- Coverage
- Price
- Validity period
4. Buy your aloSIM eSIM
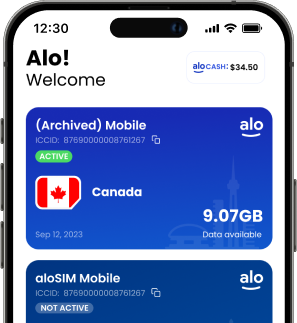
Time for the easiest part: buying your eSIM. You can purchase right from the aloSIM website or install the app (available for both Android and iOS) and select your plan that way.
You’ll receive a QR code upon purchase. Use this to install the eSIM directly onto your device.
5. Set up your eSIM before you leave Canada
No need to wait until you’ve arrived at your destination to install your aloSIM eSIM. In fact, installing it beforehand ensures everything is ready to go the moment your plane lands.
This process is quick and easy. Once you arrive, you can activate your eSIM. Just switch it on under your phone’s settings, enable mobile data, and you’re good to go. You’ll instantly have access to the local data network without having to find wifi or buy a SIM card at the airport.
Bonus tip: Chat with your phone carrier before you jet off to make sure not charged $20/day (or worse) in roaming fees or international charges.


